#0, Project Angus: A Milestone
Posted by Gryphon on Apr-12-26 at 11:07 PM
LAST EDITED ON Apr-12-26 AT 11:13 PM (EDT)
For the first time in more than 30 years, Angus lives.Oh yeah, and I fit behind the new wheel, too. But that's not what's really important right now. Of course, I didn't hog the experience. Obviously we have a hell of a lot still to do, but... this is the first time that chassis has moved under its own power in decades. That ain't nothin'. --G.
-><-
Benjamin D. Hutchins, Co-Founder, Editor-in-Chief, & Forum Mod
Eyrie Productions, Unlimited http://www.eyrie-productions.com/
zgryphon at that email service Google has
Ceterum censeo Carthaginem esse delendam.
#1, RE: Project Angus: A Milestone
Posted by Peter Eng on Apr-13-26 at 10:57 AM
In response to message #0
I was imagining taking it down to the auto parts shop like that, but there's not enough cargo space, and for all I know, there's some law against taking it on the road without all the bits in place.Peter Eng
--
Insert humorous comment here.
#3, RE: Project Angus: A Milestone
Posted by Gryphon on Apr-13-26 at 03:27 PM
In response to message #1
>I was imagining taking it down to the auto parts shop like that, but
>there's not enough cargo space, and for all I know, there's some law
>against taking it on the road without all the bits in place. The laws around here don't have anything to say about missing body panels as such, but since all the lights and whatnot are also missing and we haven't repaired the holes in the cab floor yet, it wouldn't pass a state safety inspection. It also hasn't been registered since 1994 and there's nowhere to hang a license plate. So... yeah. I joked about maybe running down to Dollar General, but the old man was having none of it. :) --G.
no seat belts right now, either, not that they were even required in 1966
-><-
Benjamin D. Hutchins, Co-Founder, Editor-in-Chief, & Forum Mod
Eyrie Productions, Unlimited http://www.eyrie-productions.com/
zgryphon at that email service Google has
Ceterum censeo Carthaginem esse delendam.
#2, RE: Project Angus: A Milestone
Posted by BroderTuck on Apr-13-26 at 03:06 PM
In response to message #0
Was this "Angus the testbed for the Impala engine" or "Angus with its own engine"?
I've lost track a bit.
#4, RE: Project Angus: A Milestone
Posted by Gryphon on Apr-13-26 at 03:31 PM
In response to message #2
>Was this "Angus the testbed for the Impala engine" or "Angus with its
>own engine"?
>I've lost track a bit. The original plan was to run this engine in the truck as a test and then transplant it to the Impala, but at this point I believe we've abandoned that plan. Right now it looks like the Impala will either keep the engine it's got (possibly with some mods to bring it up to a slightly later spec, like replacing the DC generator with a more modern AC alternator), or receive a different one when the time comes. Or, who knows, maybe I'll be seized with an ardent desire to return Angus back to its original 6-cylinder glory and build a 292 for it or something... it's only parts! --G.
I do kind of miss the old Turbo-Thrift wheeze
-><-
Benjamin D. Hutchins, Co-Founder, Editor-in-Chief, & Forum Mod
Eyrie Productions, Unlimited http://www.eyrie-productions.com/
zgryphon at that email service Google has
Ceterum censeo Carthaginem esse delendam.
#5, session 19
Posted by Gryphon on Apr-26-26 at 11:39 PM
In response to message #0
Mostly prep work for the next phase today. Lots of body work to be done. NOTE: We are not good at nor enthusiastic about body work. :)We'll be working on the areas around the bottoms of the doors, so they had to come off. 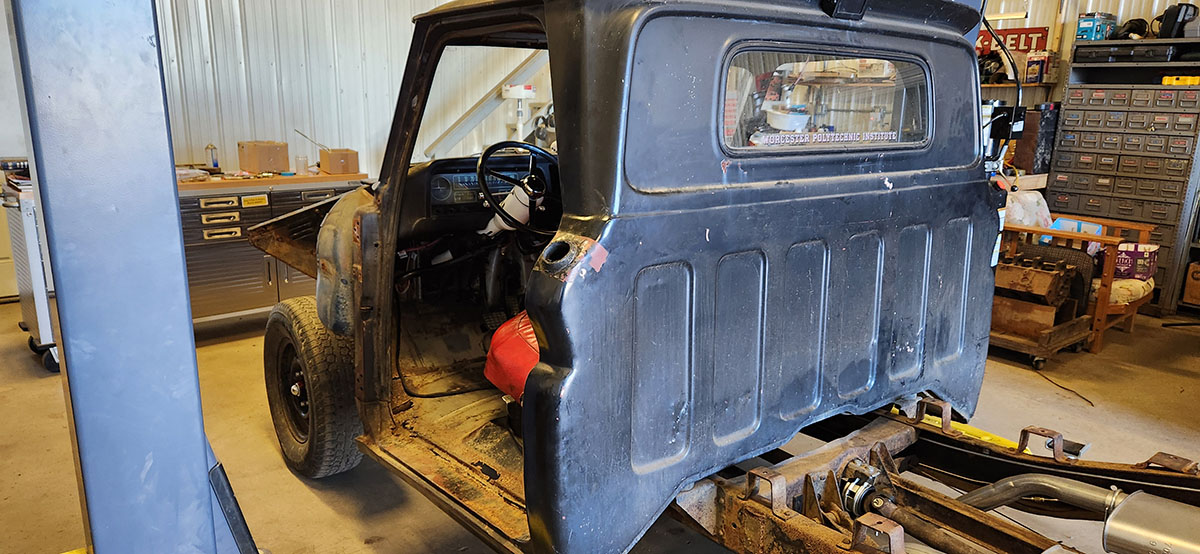
The doors need a bit of work too, but for now we're just going to stash them over by the wall. We lashed them to the electrical conduit so they can't fall over. That glass is expensive! 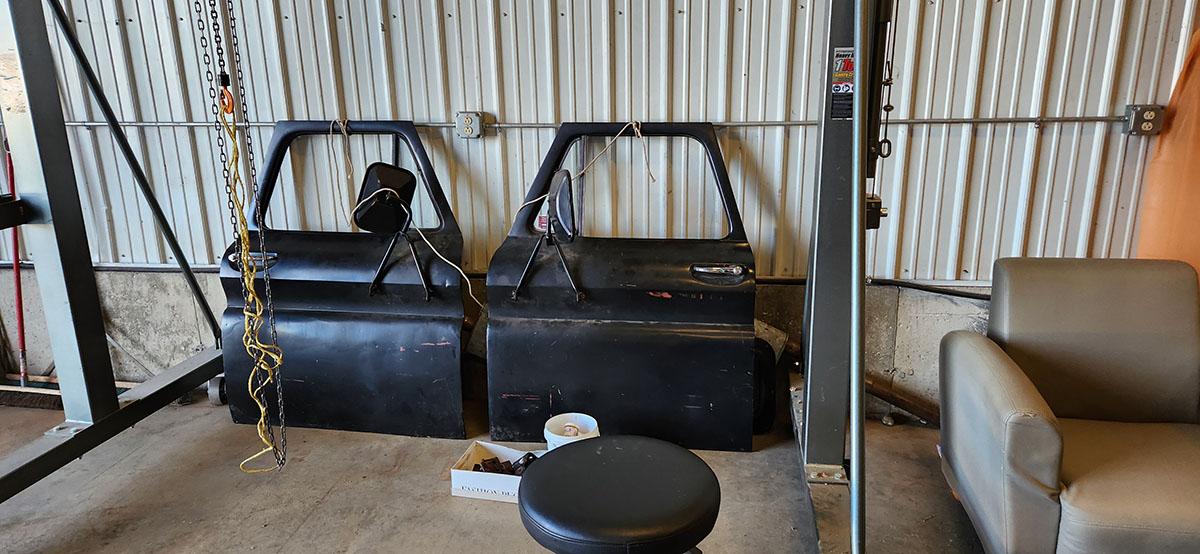
To give you an idea of what we're up against, although almost all the cab metal above the floor line is in pretty good shape, both rocker panel/door sills are in rough shape. The driver's side, seen here, is actually the better of the two... 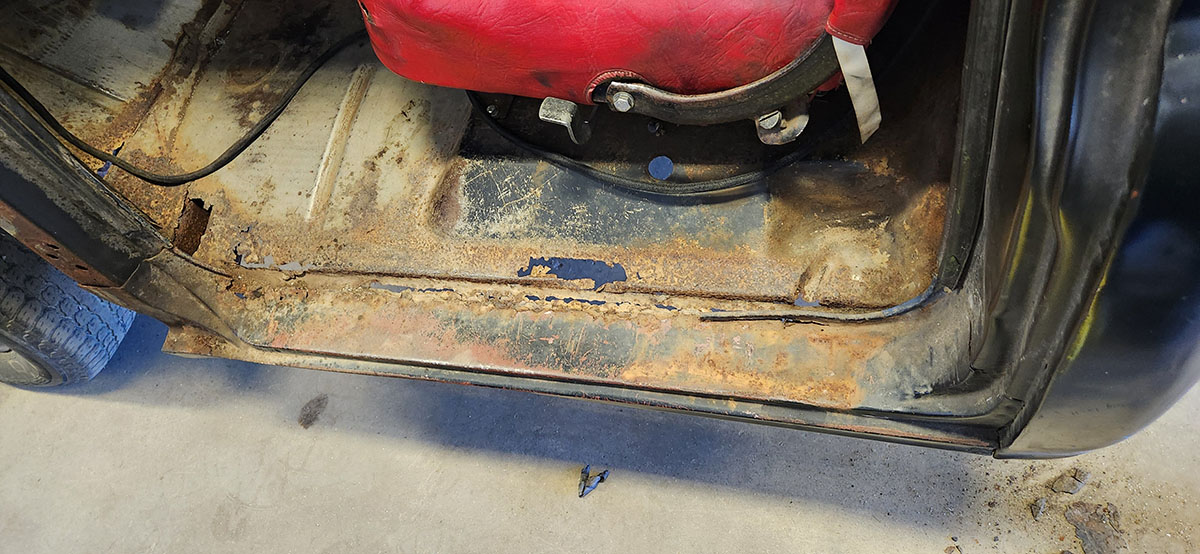
... never mind that large and rather puzzling hole. How did that get there? It's not even the lowest point of that panel. The rest of that rot makes sense, but that hole does not. (Also note the round hole just below the seat edge, with the two obvious screw holes flanking it. What was there? Why did some previous owner choose to put whatever it is right there? We will never know.) It wasn't all grunt work and prep. We also took the opportunity to make one critical adjustment to the cab. Note the boring, completely featureless knob our shift lever kit came with. 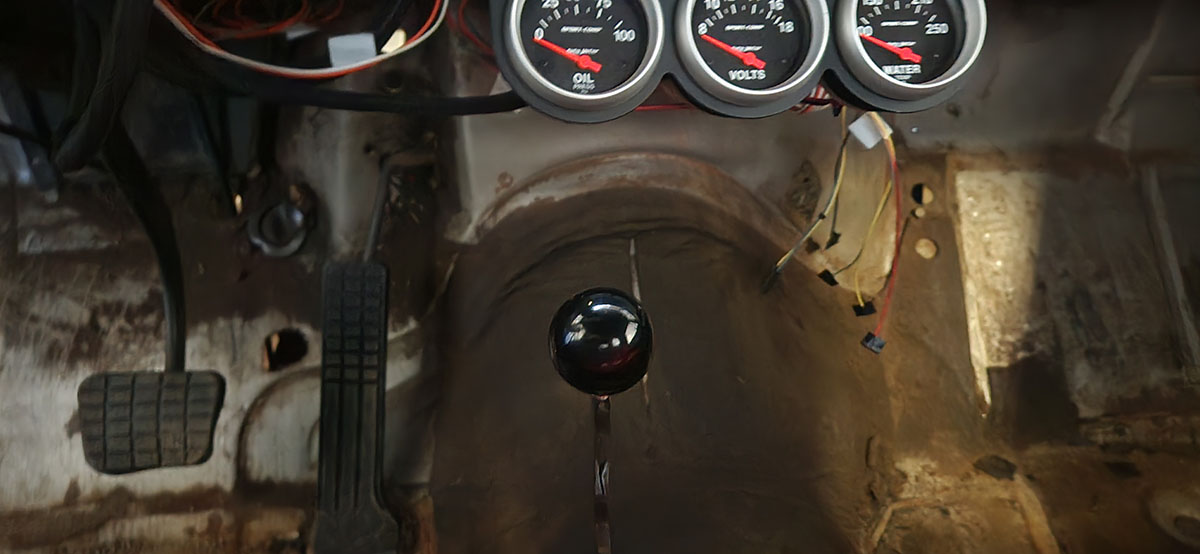
Surely we can do better than that? Why yes. Yes we can. 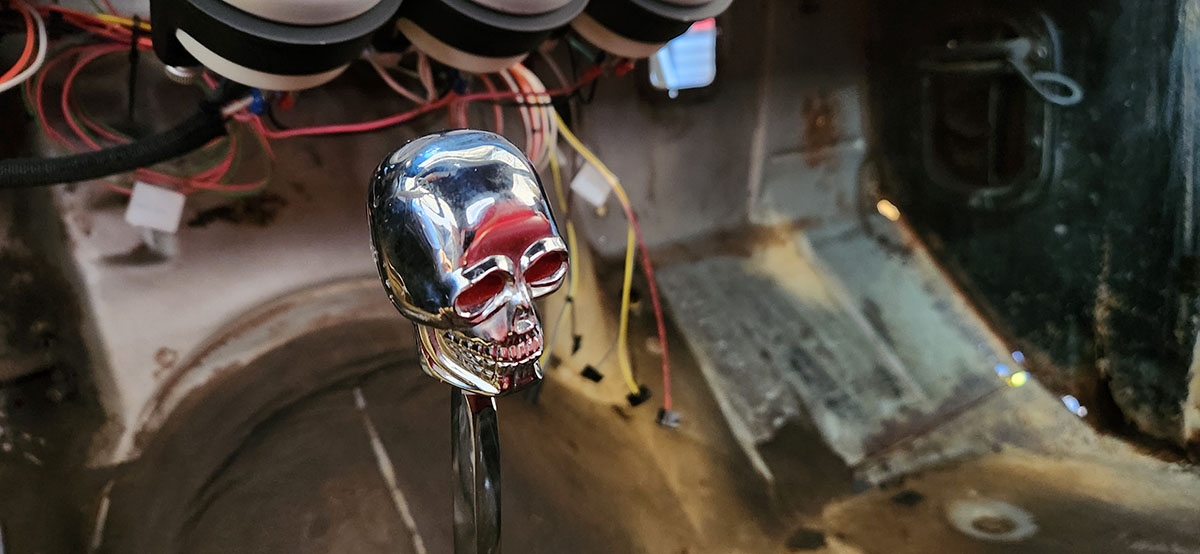
That's more like it. I hereby dedicate this gearshift lever to Mori Calliope. As an aside, that shift knob is one of the all-time Mr. Gasket classics, still in production since... sometime in the 1960s, I think? Check out the vintage OEM packaging on this one, which I found on eBay. 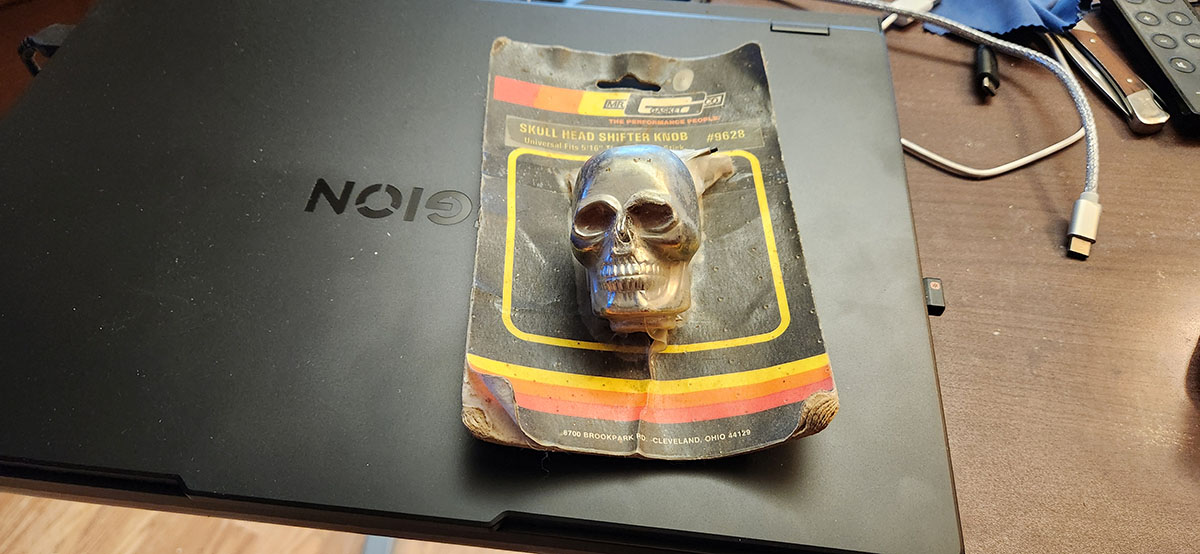
If I had to guess, I'd say that packaging is from the 1980s at least. Well before the plastic clamshell era (that's what the new ones come in nowadays). I almoat hated to open it, but hey, these things are made to be used, not to sit around in plastic wrap forever. --G.
-><-
Benjamin D. Hutchins, Co-Founder, Editor-in-Chief, & Forum Mod
Eyrie Productions, Unlimited http://www.eyrie-productions.com/
zgryphon at that email service Google has
Ceterum censeo Carthaginem esse delendam.
#6, RE: session 19
Posted by Gryphon on May-22-26 at 07:20 PM
In response to message #5
More work on the passenger side of the cab. I've decided to group stuff that takes more than one day together as the same "session" to give more of a sense of progression.After pulling the remains of the outer rocker off and getting a sense of what needed to be cut away in the structures underneath (previous post), we got to the task of actually doing so. 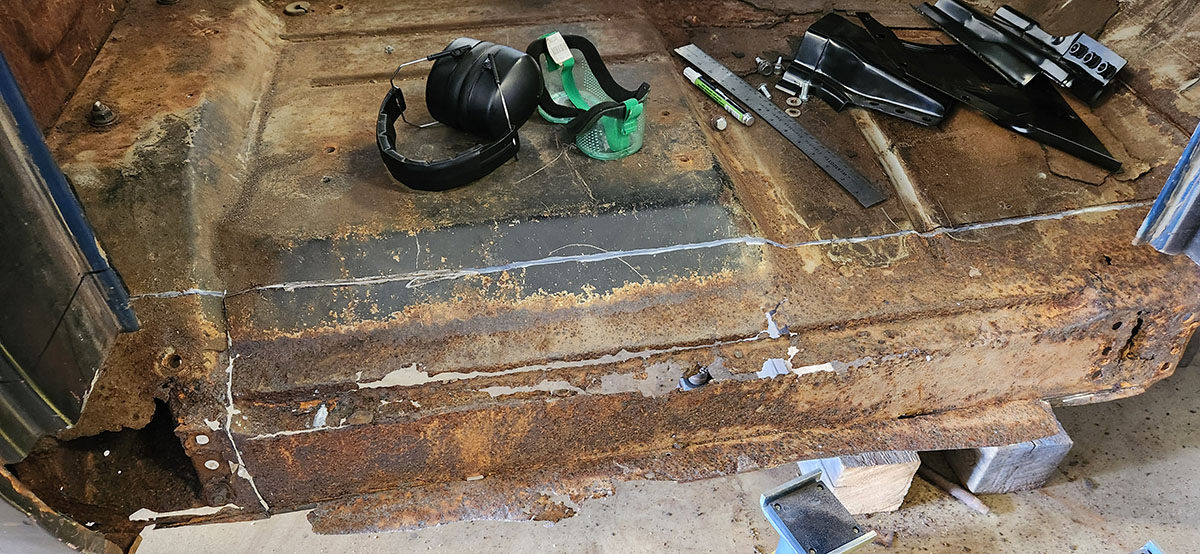
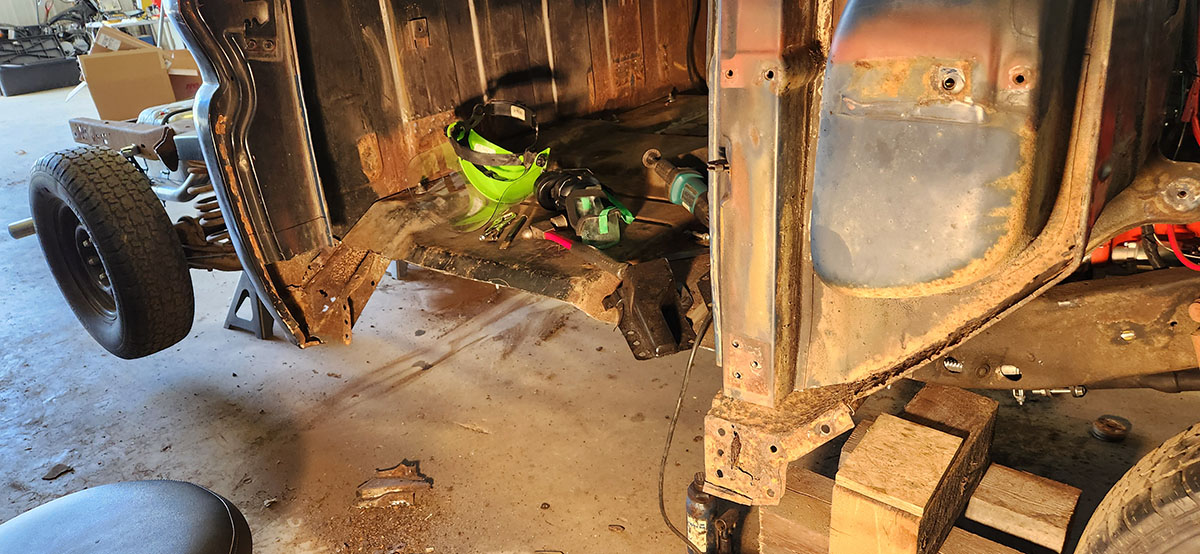
The corners also needed some work, but I didn't get very good pictures of that. The new panels for those areas mostly fit over the damaged areas instead of completely replacing them, because the way the corners are built makes it very difficult to replace them entirely without the specialized equipment they had at the assembly plant back in the day. As an aside, I think I've mentioned this before, but this particular truck was assembled at Chevrolet's assembly plant in Fremont, California--which, after several twists and turns of usage and ownership in the intervening decades, is now Tesla's factory. Life is strange. Anyway, with the rotted panels removed, the next step was a test fitment of the new inner parts. These are held together by bolts at the ends, which makes it possible to fit them into place and hold them there for welding or riveting without any special jigs or anything. 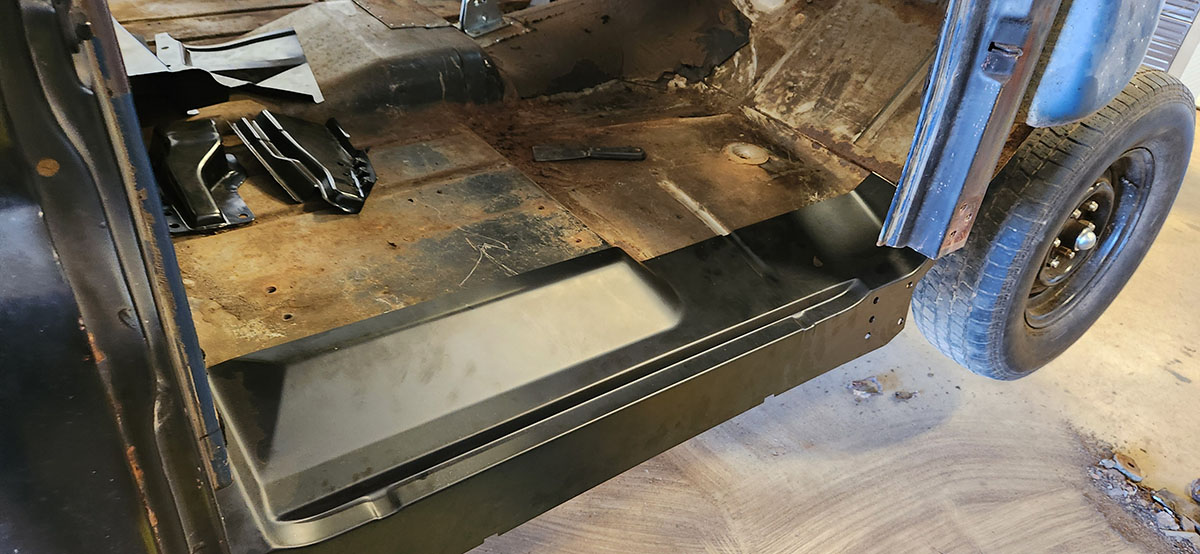
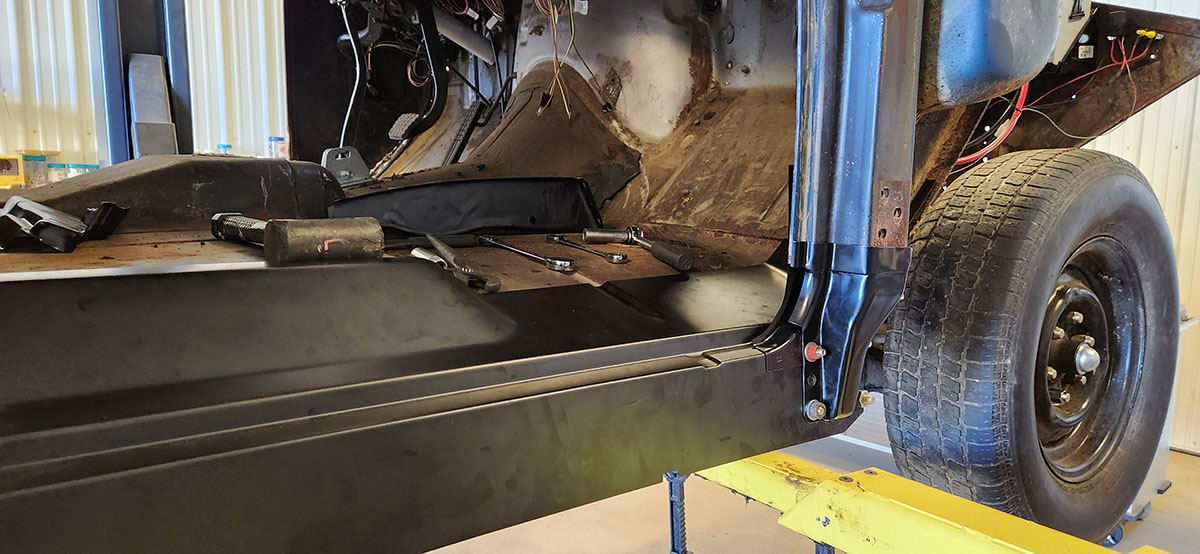
The next step here will be to take those panels back off again, spray the remaining metal with a rust converter to stabilize them, and then put the panels back with liberal doses of seam sealer. After that, it'll be time to screw them in place, then replace the screws one by one with blind rivets to attach the new panels permanently. Then more seam sealer, then a coat of primer, followed by bed liner. That ought to hold everything together. And then, off to the driver's side to do it all again... --G.
-><-
Benjamin D. Hutchins, Co-Founder, Editor-in-Chief, & Forum Mod
Eyrie Productions, Unlimited http://www.eyrie-productions.com/
zgryphon at that email service Google has
Ceterum censeo Carthaginem esse delendam.
#7, RE: session 19
Posted by Gryphon on May-26-26 at 03:49 PM
In response to message #6
The passenger side main floor piece is in, as well as the connecting bits for the rear cab support and inner corner.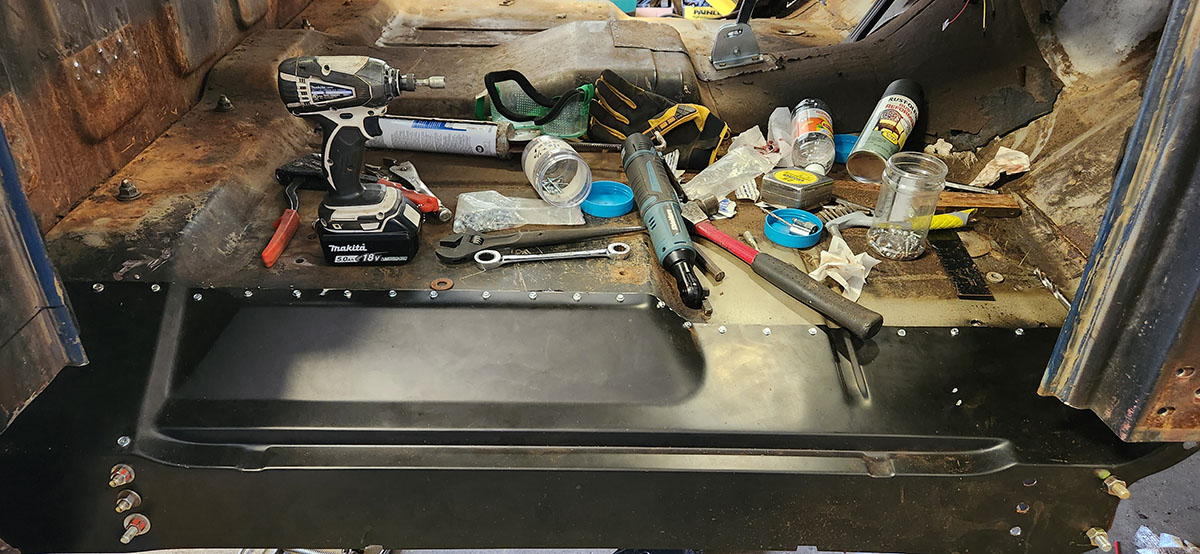
There's a heavy bead of seam sealer underneath the overlapping edge there, and we'll be putting more on once those screws are replaced with rivets. Then there's a couple of pieces to go together in the front cab corner, after which we'll re-hang the door and make sure everything fits together properly before we attach the outer rocker panel. Then it's time to go do the same thing over again on the driver's side! Whee! --G.
-><-
Benjamin D. Hutchins, Co-Founder, Editor-in-Chief, & Forum Mod
Eyrie Productions, Unlimited http://www.eyrie-productions.com/
zgryphon at that email service Google has
Ceterum censeo Carthaginem esse delendam.
#8, RE: session 19
Posted by Gryphon on Jun-10-26 at 10:07 PM
In response to message #7
Man, body work is a pain in the ass. We messed something up with the positioning of the passenger side floor panel. It looks fine up at the seam with the existing panel, but it's at a slightly incorrect angle or something, because once we had it and the corner pieces together, the rocker panel would not go where it's supposed to go.Buuut we didn't think to check that before riveting the first panel in place, because it looked right up top, so unless we want to drill out dozens of rivets and probably ruin the panel and have to buy a new one, we're going to have to make it work. Cue the hammering and the screws. Lots of screws. That back corner is kind of a horror show now, but the weather seal for the door will hide the worst of the crimes, and paint and body liner should take care of the rest. Dad now wants to paint white Frankenstein stitches on the rivet lines, maybe add a couple of sticky-outy bolts up on the B-pillars. --G.
-><-
Benjamin D. Hutchins, Co-Founder, Editor-in-Chief, & Forum Mod
Eyrie Productions, Unlimited http://www.eyrie-productions.com/
zgryphon at that email service Google has
Ceterum censeo Carthaginem esse delendam.
#9, RE: session 19
Posted by Aberrant Eyes on Jun-11-26 at 04:46 PM
In response to message #8
>Dad now wants to paint white Frankenstein stitches on the rivet lines,
>maybe add a couple of sticky-outy bolts up on the B-pillars.
>
I second that notion, for whatever my opinion may accidentally be worth.-Z
#10, RE: session 19
Posted by Gryphon on Jun-15-26 at 11:53 PM
In response to message #8
Riveting together the passenger side continues. Got the front corner more or less nailed back together today.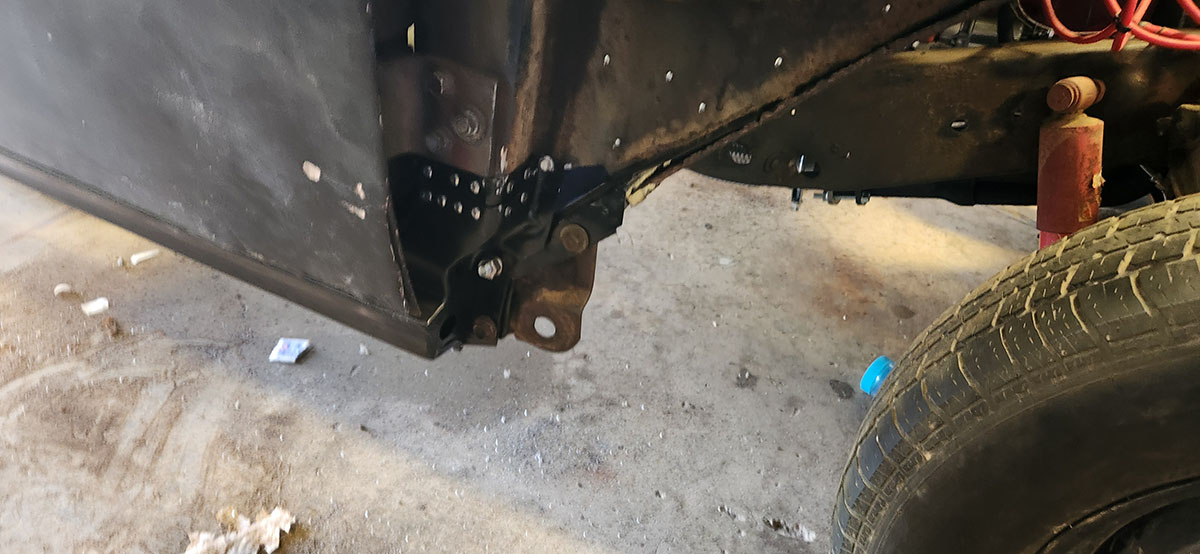
Most of what remains to be done on that side involves replacing the rest of the temporary screws with rivets, then seam sealing, painting, and applying bed liner to the affected area. And maybe a little bit of Bondo action on the most seriously messy spots; not sure about that yet. Regardless, we couldn't do the rest of the rivets today, because on the thinner panels it requires someone to be down on the floor holding rivet washers in place while the gun operator fires from above. Dad hurt his back doing yard work and can't clamber around right now, so we'll have to wait on that until he's better. However! The passenger side is now stable enough that we can move over to the driver's side and start removing stuff. The first thing that needs to go is the old rocker panel. To do that, we'll have to get in there with a chisel and break the spot welds holding it to the corner pillars at front and back. 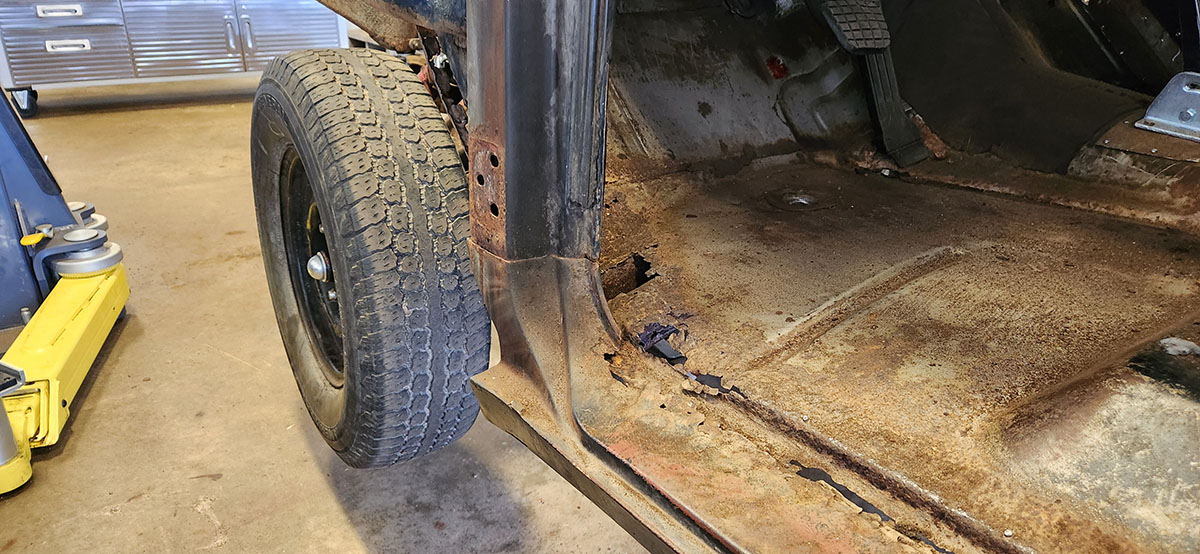
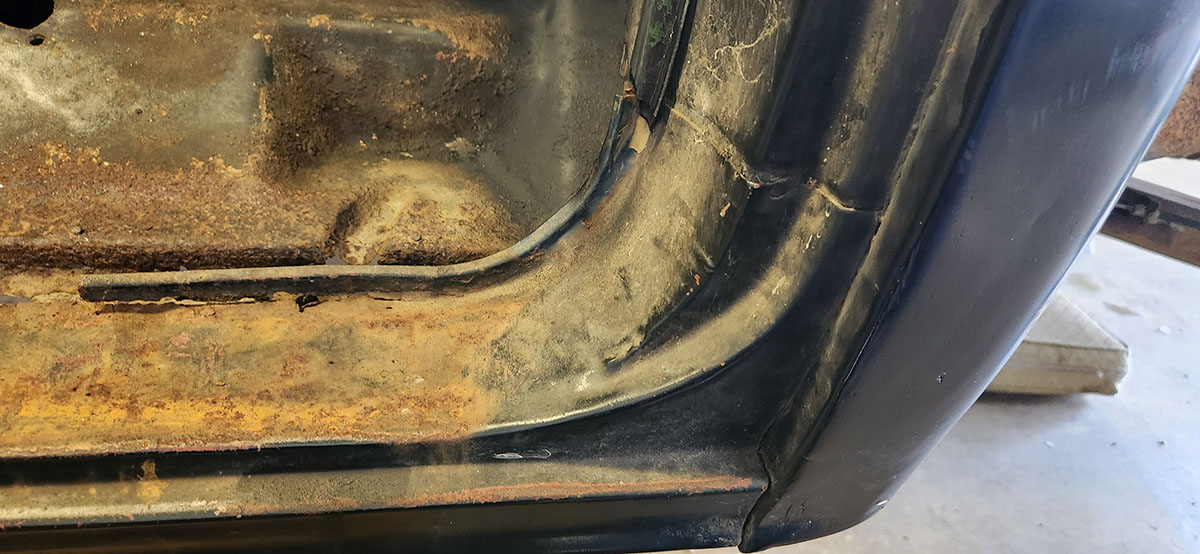
In the back, this is challenging because of all the weird contours of the panels involved, and because we don't want to damage the inner panel too much if we can help it. In the front, we were expecting it to be difficult for similar reasons, but it turned out that the inner pillar was so rusty that it just disintegrated when hit with the ol' pneumatic chisel. They don't seem to make a replacement part for that bit, probably because it's part of the main structure of the cab, so we'll have to make our own replacement for it. Otherwise the driver's door lower hinge and the front of the rocker panel won't have anywhere to attach. Anyway, this is as far as we got today: 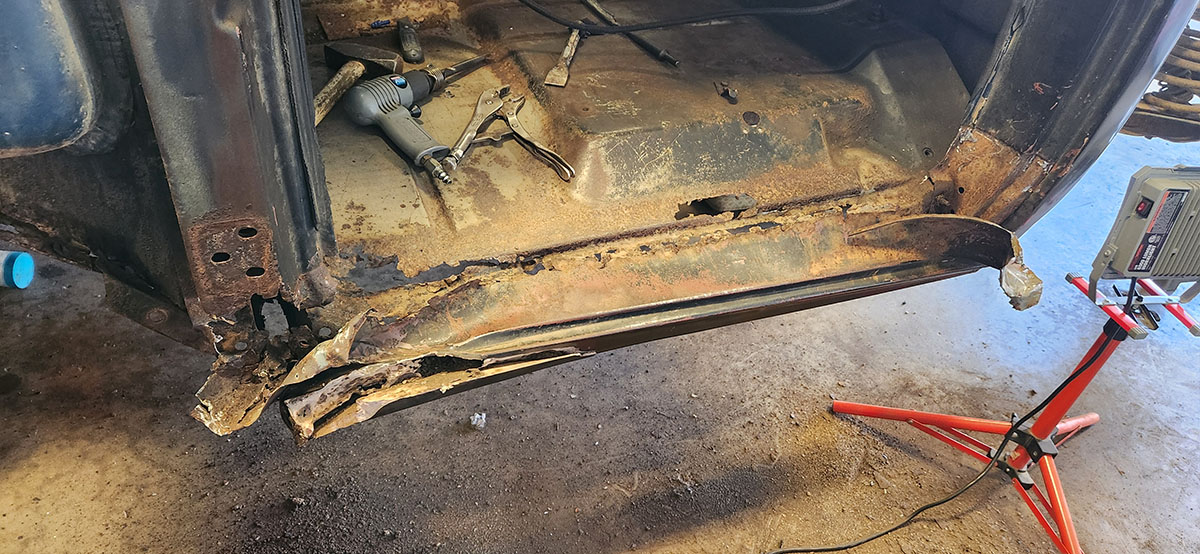
It looks bad, but it's really good. That rear corner put up quite a fight before it finally peeled apart like that. You can see how there's not much of anything at the bottom of the pillar up front, but that's a problem for another day. Once we get the rocker the rest of the way off, it'll be time to cut out the rusted section of floor, just as we did on the passenger side, and then we can start adjusting and fitting the new panels. Finally, I addressed a small furniture problem we've had, which is that we only had one rolling stool. 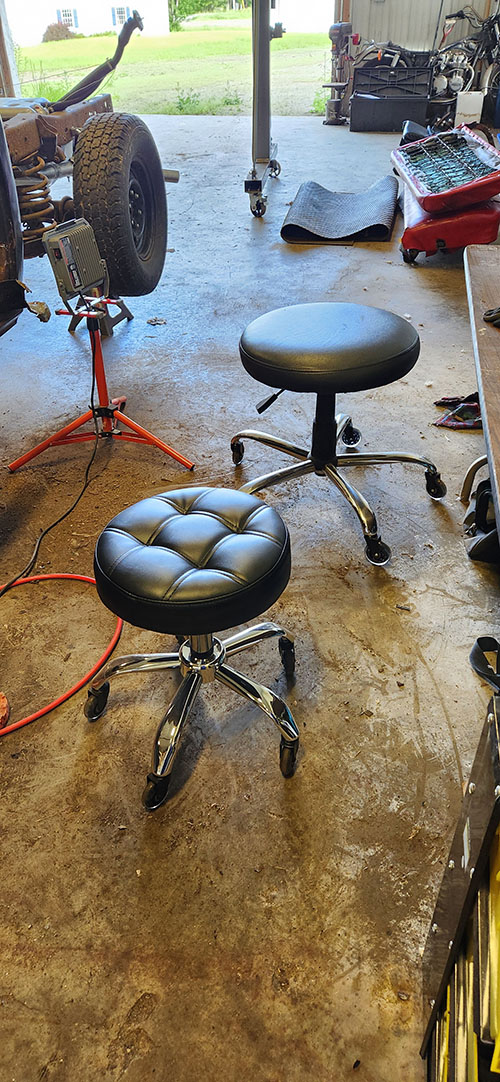
So now we have two. The bigger, older one is rated for 500 pounds. The new one is only rated for 400, but that's fine now. We'll still probably fight over the bigger one because it's more comfortable. :) Now that we've moved to the driver's side, session number will finally get iterated next time! --G.
-><-
Benjamin D. Hutchins, Co-Founder, Editor-in-Chief, & Forum Mod
Eyrie Productions, Unlimited http://www.eyrie-productions.com/
zgryphon at that email service Google has
Ceterum censeo Carthaginem esse delendam.
#11, RE: session 19
Posted by Spectrum on Jun-16-26 at 11:31 PM
In response to message #10
Wow, that's a heck of a lot of rusting away over a long period of time.
#12, RE: session 19
Posted by Gryphon on Jun-16-26 at 11:45 PM
In response to message #11
LAST EDITED ON Jun-16-26 AT 11:45 PM (EDT)
>Wow, that's a heck of a lot of rusting away over a long period of
>time. Well, it is and it isn't. I mean, yes, the rockers and outer edges of the floor panels are very rusty (as are, for some reason, the vertical outer edges of the firewall--probably because they're inside the fender wells when the front end is fully assembled). On the other hand, the rest of the cab is surprisingly solid for a vehicle of this age in New England. Granted, it spent the last 30 years inside a shed, but even so, the first half of its life was lived pretty hard for a motor vehicle made before they started making the bodies out of galvanized steel. (This truck had some adventures in the 20 years before it came into our hands, too. There are those frame modifications we can't figure out, the fact that one side of the rear body has the holes for a Deluxe side molding while the other does not, the evidence suggesting that the passenger door is from a truck that was green while the rest of it was originally blue... it's seen some shit. :) The sheer amount of crud that poured out of the back corner after we got it torn open, more of which came out every time we applied the pneumatic chisel to the front corner, was hilarious, though. You can see it all over the floor in that photo of the ripped-apart rocket panel... --G.
-><-
Benjamin D. Hutchins, Co-Founder, Editor-in-Chief, & Forum Mod
Eyrie Productions, Unlimited http://www.eyrie-productions.com/
zgryphon at that email service Google has
Ceterum censeo Carthaginem esse delendam.
#13, session 20
Posted by Gryphon on Aug-16-26 at 00:00 AM
In response to message #0
This session has been spread over a couple of months because Life, but it's all been work on the same area, so as before, I'm going to lump it together.The process on the driver's side has been much the same as on the passenger side--cutting away the worst-rusted areas and replacing them with new panels or patches, all buttoned into place with rivets (and a few screws and bolts in out-of-the-way places that won't be seen). This is what we had to work with at the start:
That rear corner didn't look too bad until we got the pneumatic chisel out and started peeling off the old rocker panel...
... at which point it basically disintegrated, revealing that it was mostly Bondo holding in a few pounds of powdered rust. Anyway, that's a problem for another day (mostly because we don't have the replacement panel for that part yet). First off, we tackled the rusted-away bottom of the front pillar, below the lower door hinge. 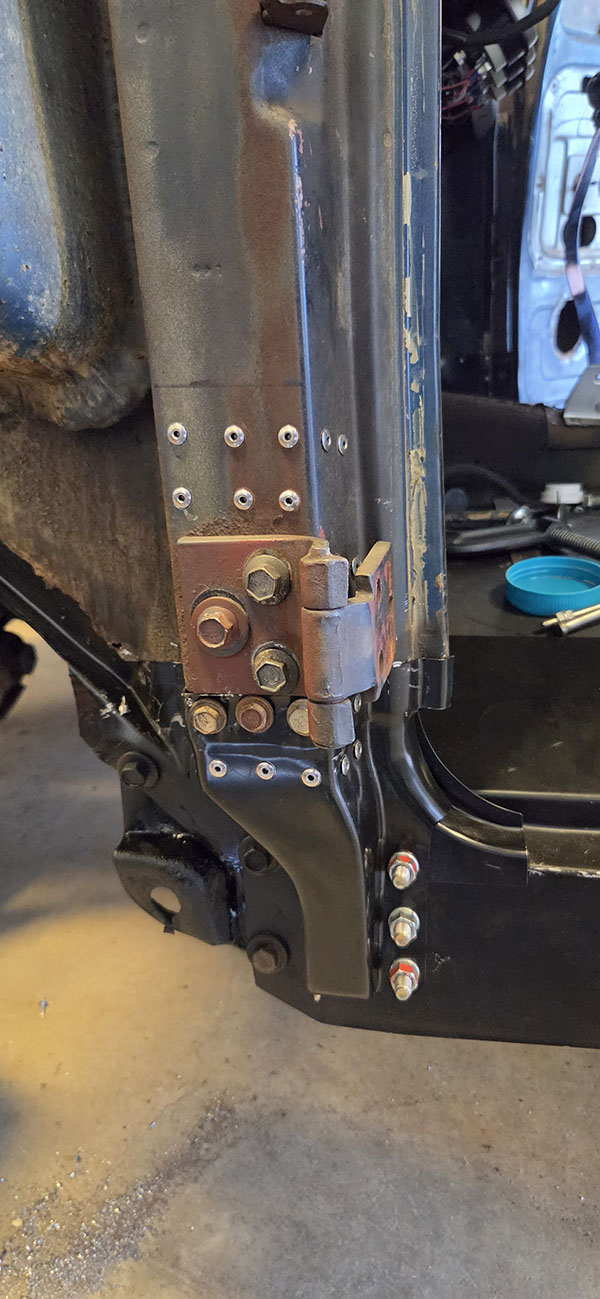
It's not visible in the photo, but there's a scratchmade reinforcement C-beam inside that lower pillar, riveted into place inside the existing pillar and the replacement panel at the bottom to help hold everything together and stabilize the hinge. Next, as on the passenger side, came chopping off the rusted-out outer edge of the floor pan and screwing the replacement panel into place, making sure it's aligned properly front and rear so that the corner pieces and the new outer rocker will fit together properly when the time comes. 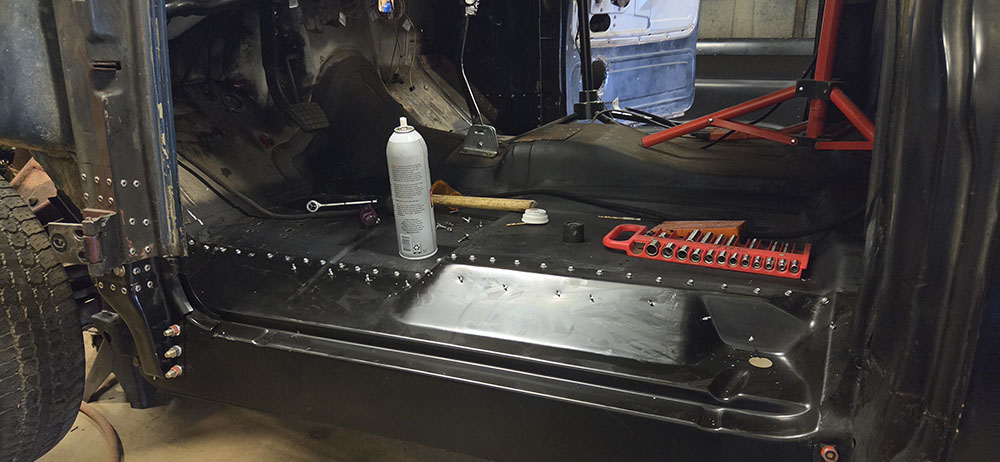
Once fully screwed in place, the process of replacing each screw with a rivet followed. 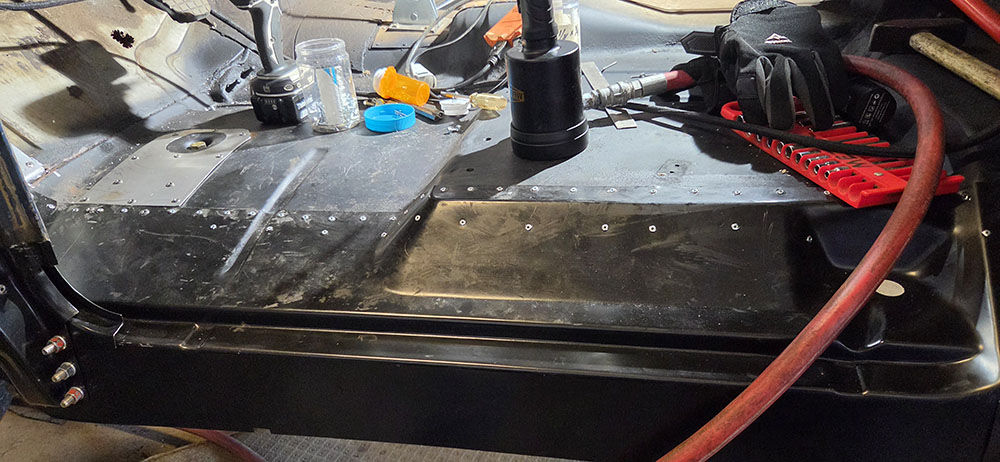
The driver's side footwell was much more badly rusted than the passenger side, unsurprisingly, and the only way to replace that bit with factory-made parts is to replace the whole floor pan. So, as on the passenger side (but to a larger extent), we had to make our own patch panels out of a combination of new-bought sheet metal and some repurposed steel shelving. Rather proud of the way this came out! 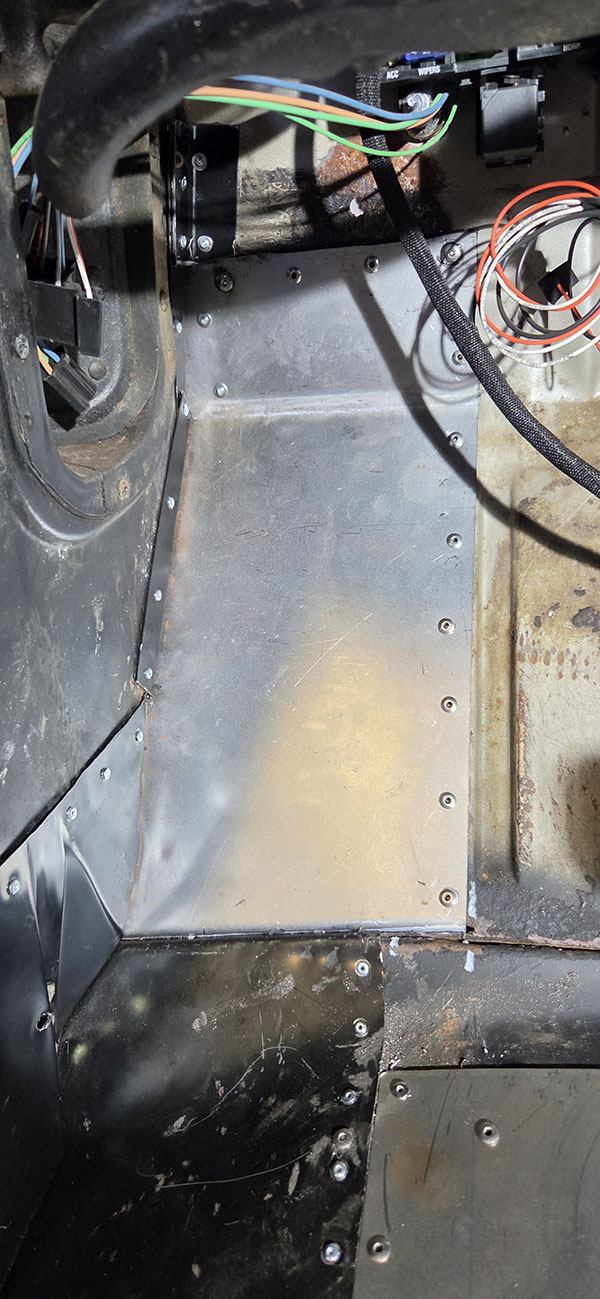
It's a bit of a mess on the outside, but since this area will be inside the fender support structure once the front end is together, we're not too worried about it. We'll paint it to retard rust, but we don't need to worry about the exposed rivet washers or the like. 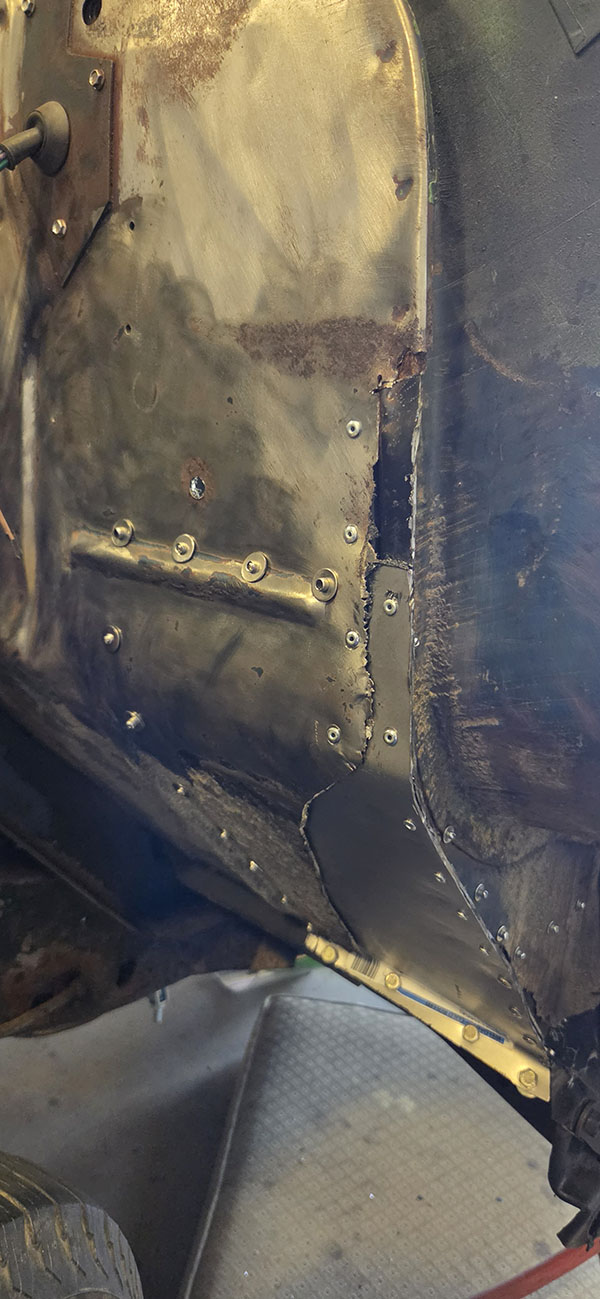
(That dark area with the jagged edges isn't a hole, it's just that the patch panel behhind it is painted black.) Finally, a repeat of the reinforcement plate over the site of the forward cab mount bolt, where we had to break a bunch of spot welds to free the rusted-out front cab support and make way for its replacement. 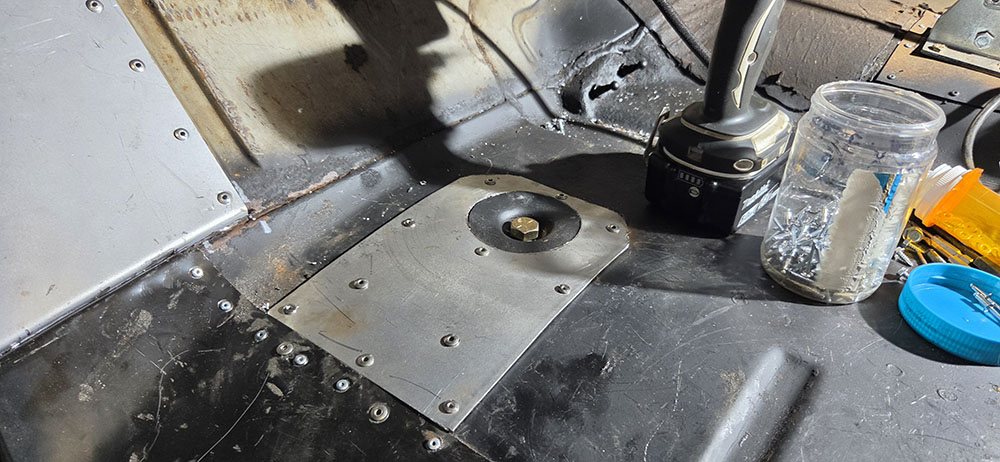
It's coming together nicely, with the front corner and floor fully repaired. We just have to cut away and replace the rear cab corner, once we have the replacement piece, and then we can get the rocker panel on and the cab sheet metal repairs will, at last, be finished. Before I close for today, I'd like to share with you a picture of what we're convinced is the most important structural member on the truck. This is at the tail end of the driver's side frame rail, which would normally be under the cargo bed. 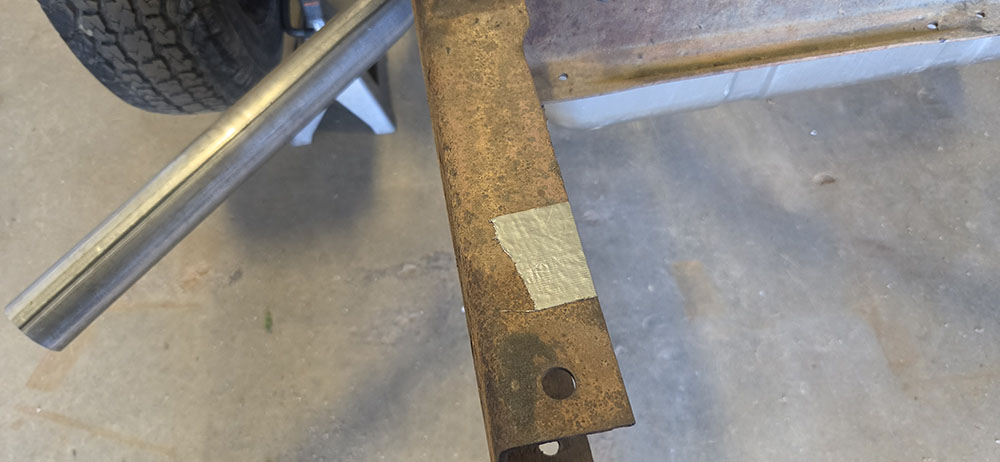
We don't know who put that duct tape there, or when, but we firmly believe that if it's ever removed, the truck will immediately crumble to pieces like the Blues Brothers' car at the end of the movie. --G.
-><-
Benjamin D. Hutchins, Co-Founder, Editor-in-Chief, & Forum Mod
Eyrie Productions, Unlimited http://www.eyrie-productions.com/
zgryphon at that email service Google has
Ceterum censeo Carthaginem esse delendam.
#14, RE: session 20
Posted by StClair on Aug-16-26 at 01:03 AM
In response to message #13
> We don't know who put that duct tape there, or when, but we firmly believe that if it's ever removed, the truck will immediately crumble to pieces like the Blues Brothers' car at the end of the movie.No bet.
#15, RE: session 20
Posted by Aberrant Eyes on Aug-16-26 at 05:34 PM
In response to message #13
>We don't know who put that duct tape there, or when, but we firmly
>believe that if it's ever removed, the truck will immediately crumble
>to pieces like the Blues Brothers' car at the end of the movie.
>
(Spoiler warning for a 158-year-old poem.)"You see, of course, if you're not a dunce,
How it went to pieces all at once,—
All at once, and nothing first,—
Just as bubbles do when they burst.
End of the wonderful one-hoss shay.
Logic is logic. That's all I say."
-- Oliver Wendell Holmes, "The Deacon's Masterpiece, or the Wonderful One-Hoss Shay" (The Atlantic Monthly, September 1858)
#16, RE: session 20
Posted by Gryphon on Aug-25-26 at 08:38 PM
In response to message #13
New cab corner panel came today.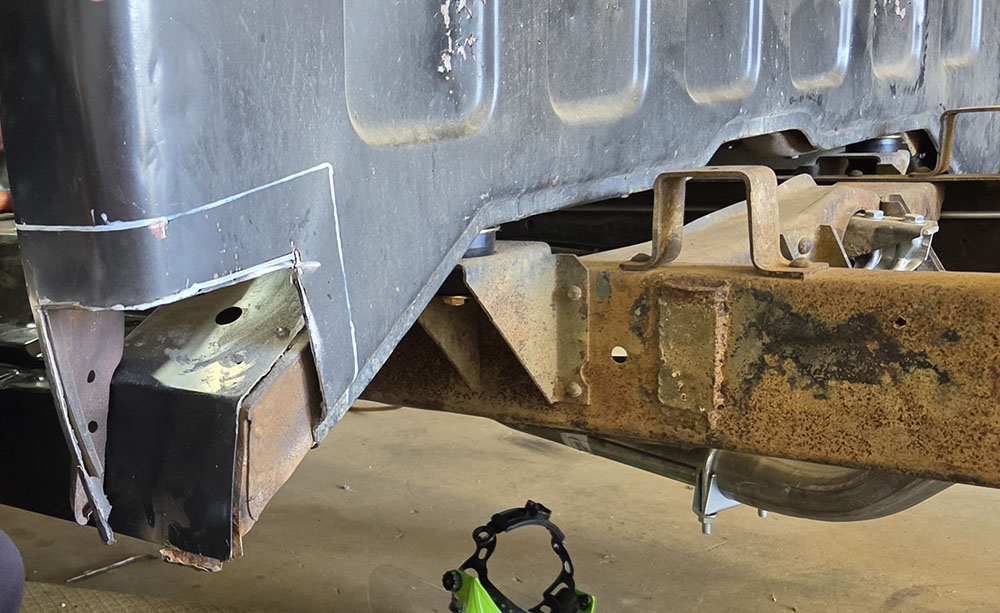
Cut out the rusted-out lower corner and far enough up to allow for good overlap with the replacement (the outer white line is where the edge of same was when we test-fit it over the original)... 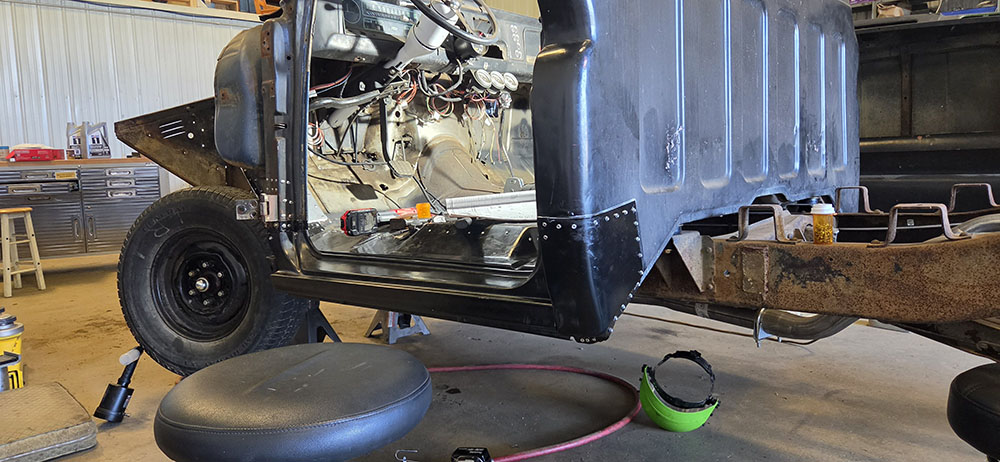
... and here it is screwed in place, along with the new rocker panel. Now that everything there is (we hope!) correctly fitted together, we can move on next time to replacing those screws with rivets, as per our usual procedure. Following that, we need to replace a worn-out hinge pin on the upper driver's door hinge. If that solves the excessive play in the hinge, we can hang the door; if not, the hinge itself will need replacing, which will lead to another small delay while we wait for the parts to ship. Still, the end of the body work is in sight. (The metal part, at least. We do still need to put some Bondo over the outer seams and blend everthing together as best we can to get it ready for paint.) --G.
-><-
Benjamin D. Hutchins, Co-Founder, Editor-in-Chief, & Forum Mod
Eyrie Productions, Unlimited http://www.eyrie-productions.com/
zgryphon at that email service Google has
Ceterum censeo Carthaginem esse delendam.
#17, RE: session 20
Posted by Gryphon on Sep-06-26 at 02:08 AM
In response to message #16
Just a quick update today. I didn't get any pictures, but the riveting on the replacement cab corner and the front post is done. We think that's all the riveting, apart from a patch in the driver's footwell that's going to be a real pain in the ass to get to. Also, the hinge pin kit, which included some nice brass shims, solved the wobbly door hinge problem perfectly, so no need to go ordering replacement hinges.The next step is to hang the driver's door and see how the rocker panel needs to be adjusted, but unfortunately Dad's gone and hurt his back building a deck, so that's slowed down the process considerably and there's not going to be any heavy lifting until he's made a full recovery. --G.
-><-
Benjamin D. Hutchins, Co-Founder, Editor-in-Chief, & Forum Mod
Eyrie Productions, Unlimited http://www.eyrie-productions.com/
zgryphon at that email service Google has
Ceterum censeo Carthaginem esse delendam.
|