More parts shipments have arrived! This stuff is for later: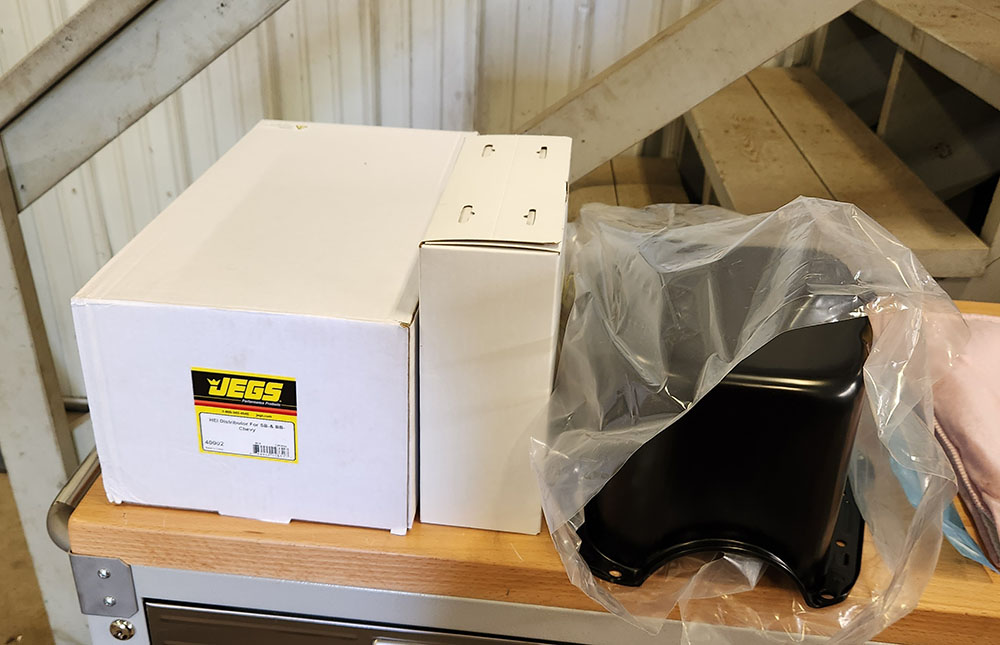
That's an HEI (high energy ignition) distributor, a box of spark plug wires, and a fresh new oil pan.
A couple of other boxes, including one we spent part of the afternoon waiting for FedEx to bring, contained stuff for this session, namely, the rocker arms and push rods needed to complete the valve train.
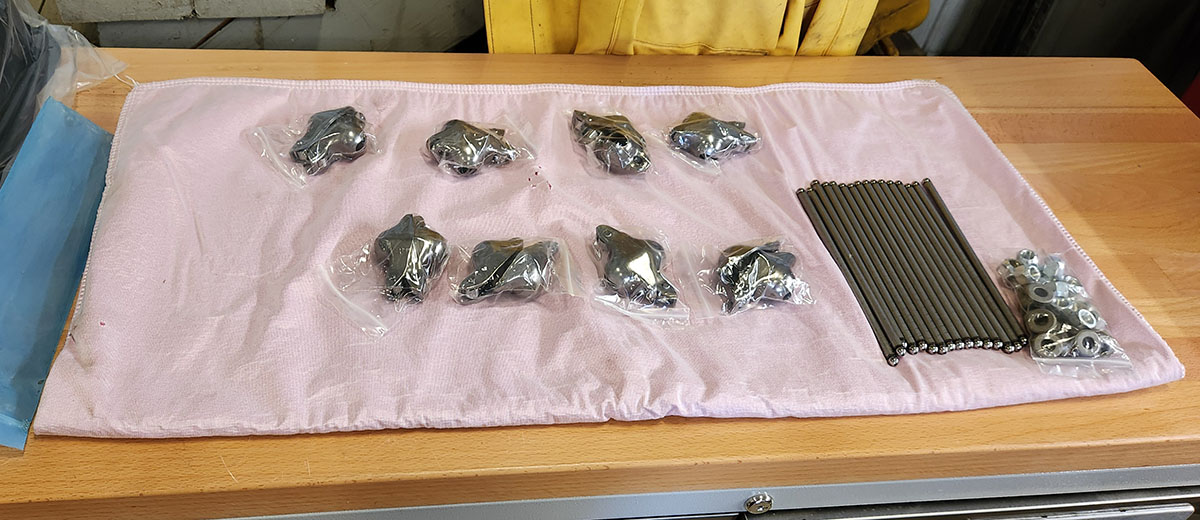
(Naturally the push rods, which were the first thing we needed, were the last to arrive. :)
Step 1: slide the push rods through their guide holes in the cylinder head and make sure they're seated in the lifters.
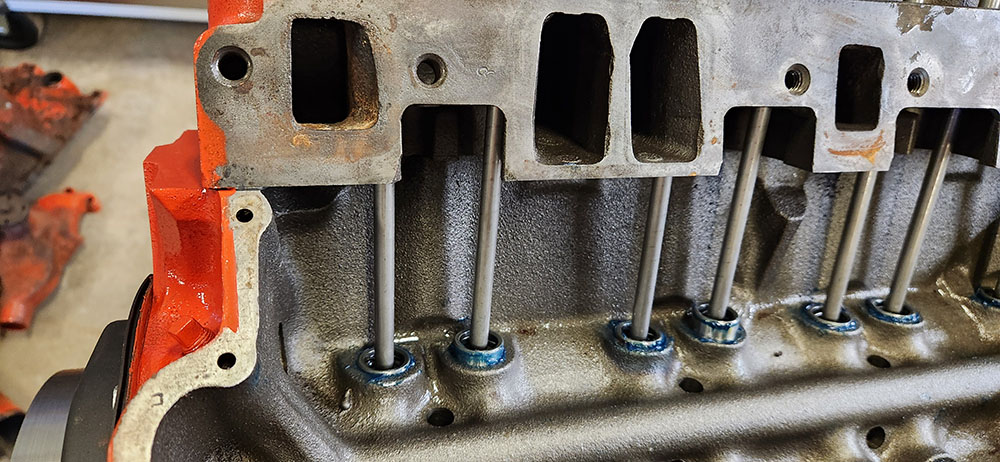
I put a blob of assembly lube in each lifter to get them started. Once the engine is fully put together and has the chance to build some oil pressure, the lifters will be filled with oil and the lube (as well as the heavier assembly grease they were smeared with before they were installed) will dissolve.
Once the rods were in place, I could turn my attention to the rocker arms.
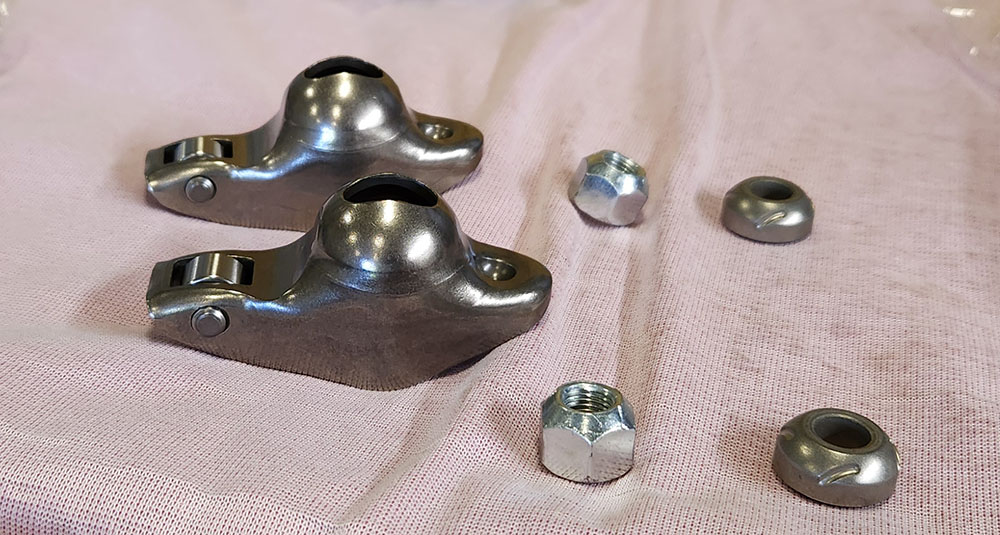
Above is a close-up shot of one cylinder's pair of rocker arms with their attendant hardware. Each rocker rides on a stud alongside the valve it controls. The hemispherical washer-looking thing fits on the stud inside the rocker with the curvature downward, providing a surface for it to pivot on, and then the nut is screwed onto the stud with the tapered end upward. Once each nut is screwed down far enough for the tapered end to engage the threads, it's locked and (theoretically) can't back off without the aid of a wrench.
In this case, since we had to get new ones anyway, Dad sprang for a set of roller rockers, which he says he's never used before. The little roller rides on the top of the valve, reducing friction between the two surfaces as the rocker... well... rocks. This supposedly increases power a tiny bit, but I think its main advantage is reducing wear.
Here's what they look like when screwed on:
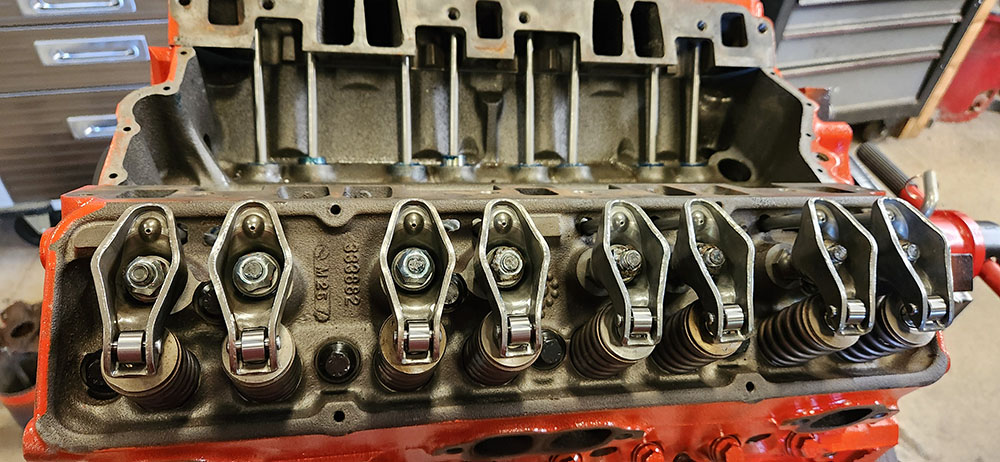
In this pic, you can see the ball ends of the push rods poking through their holes in each rocker arm. They have to be open like that because of the oil passage that runs up the inside of each push rod, which is the main way in which the valve train gets lubricated. You can't really see it in this photo, but there's assembly lube all over those points of contact, to prevent excessive wear between the engine's first startup and the oil reaching these areas.
Here's an overhead (as it were) view of the engine with rockers installed on one side, but not the other. I think this one gives a good overview of how the lifters, push rods, rockers, and valves relate to each other in physical space:
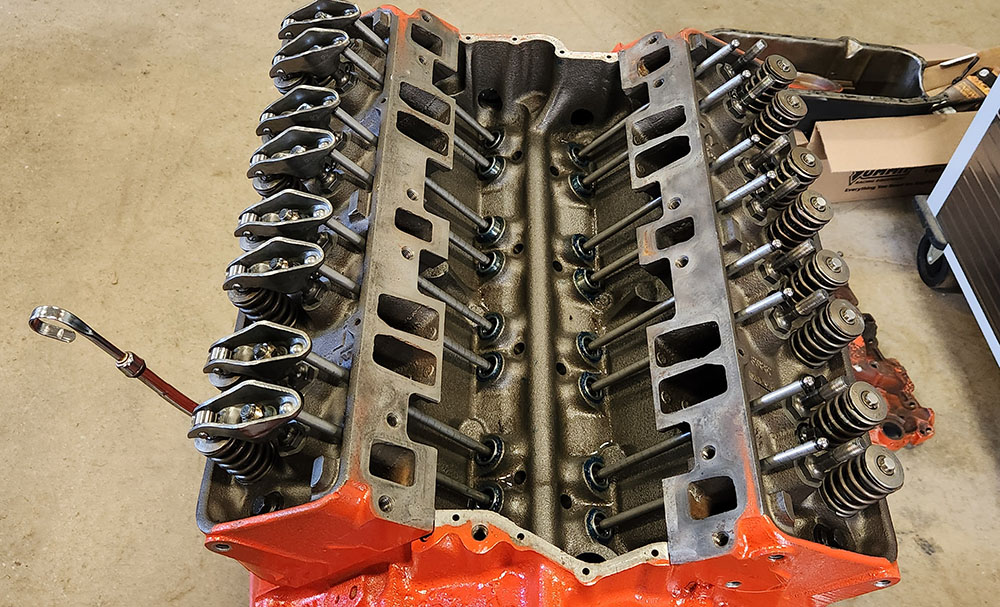
At this stage, some of the lifters still weren't quite in their correct positions. A couple were stuck in the "up" (i.e., valve open) positions, and wouldn't go all the way down even after their cam lobes moved out from under them. This is fairly normal when first assembled, and once all the rockers were in place and we had some tension in the system, they all came around and started rising and falling as they should.
(Note that the opposite, a lifter being all the way down and never coming up, is a much worse problem. It means that, at best, the face of the lifter is so badly dished that the cam lobe is no longer hitting it, or, at worst, that the cam lobe is wiped. If the latter happens, the cam is trashed and has to be replaced. The fear of wiping a cam lobe on first startup is why we use so much grease and assembly lube during the initial build.)
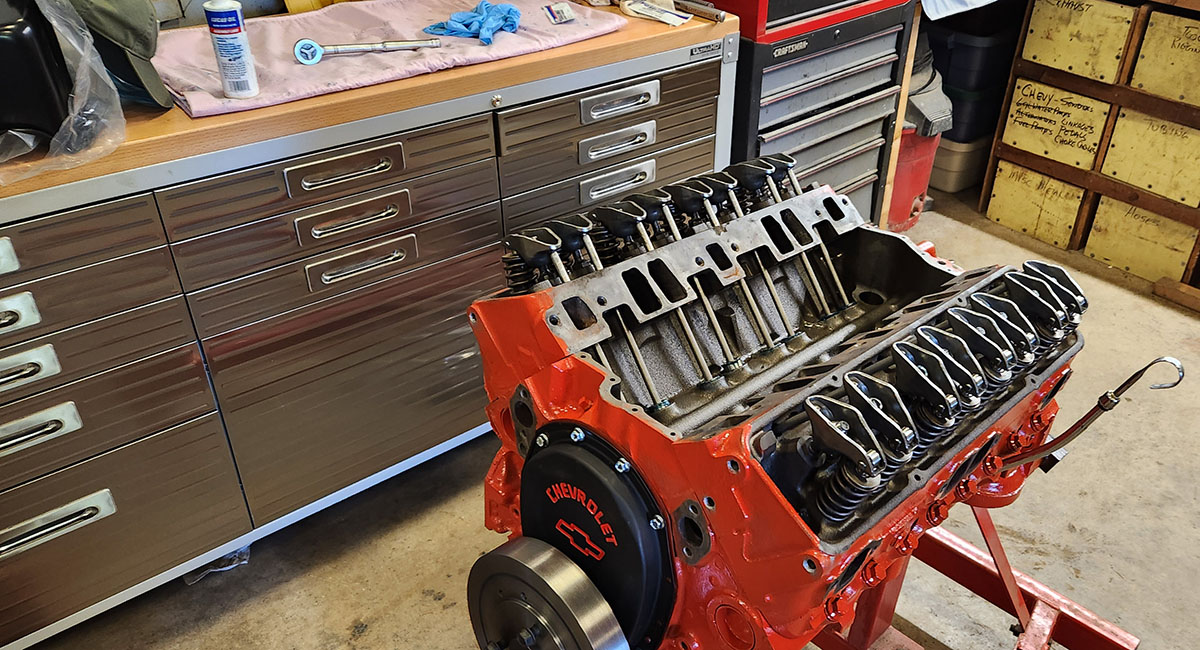
And here it is with all 16 rockers installed.
Because of the way the rocker arms work, they need a lot of adjusting when first installed so that they take up the slack in the lifters' internal springs (this is called "pre-loading" the lifters) without being screwed down so tight they force the valves open on their own. Since the tension on each push rod and rocker constantly changes as the engine rotates and the cam lobes engage with and disengage from each lifter, this means turning the engine through several revolutions by hand and adjusting each rocker nut several times.
Even then they won't really be right. These engines can never be fully adjusted before they've actually run; only with oil pressure, heat, circulating coolant, and all that do all these parts take their true final positions relative to each other and start operating as they're going to. Fortunately, they're forgiving enough machines that you can generally start them even with most everything slightly out of whack, then make all the final adjustments once things are heated up and doing what they're going to do. What we're doing during the build process is trying to minimize the out-of-whackness as much as possible, to give ourselves the best odds of getting the thing going in the first place so we can fix everything we didn't quite get right when it was all cold and new. If that makes any sense.
Speaking of which, someone was asking about the timing pointer. We'll be seeing more of that when we do get to the "running but everything is messed up" stage, since a major part of that process is getting the engine's timing right, but for now, we've replaced the shiny chrome pointer that was a little too long with the original one, now slightly reconditioned.
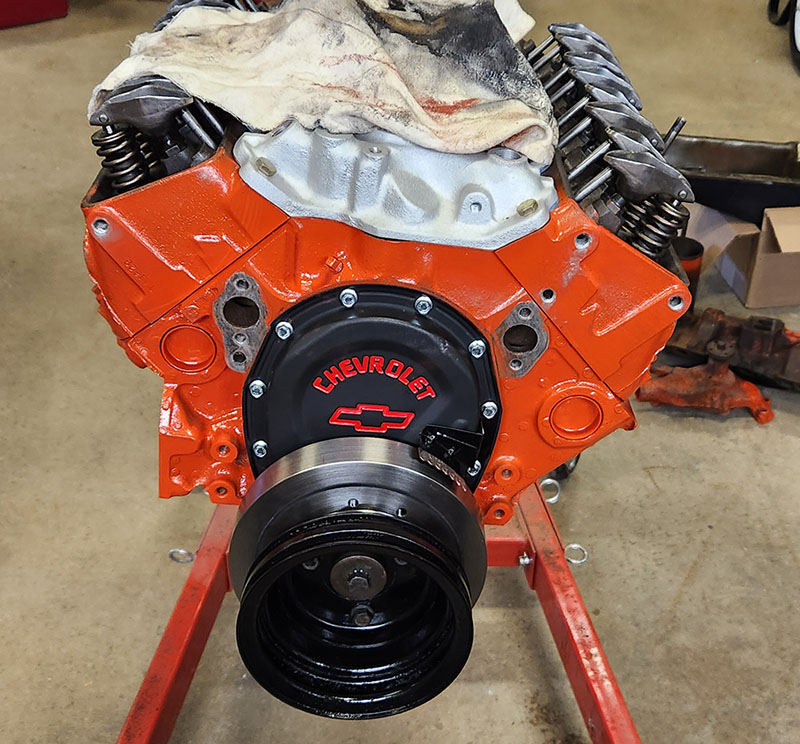
I'll try to remember to get a better shot of it next time, but even in this view, you should be able to see that it doesn't come right out to the front edge of the damper. There are degree marks on both the damper and the pointer, which are used as reference points when setting the engine's timing, and the old one was so big it just covered the ones on the damper.
Also, in this view you can see that we installed the freshly repainted pulley on the front of the damper. This is used to drive the coolant pump (not installed yet), alternator, and anything else that needs to be driven from the crankshaft. In a modern car this is usually done with a single insanely complicated serpentine belt that zigzags around the front of the engine compartment turning all the stuff that needs power. Older systems like this one were a little simpler. This pulley has grooves in it for two belts: a triangular one to run the water pump and alternator, and a simple oval one to run the power steering pump.
If we ever wanted to put in something like air conditioning, that would get more complicated, but aftermarket AC conversion kits usually come with whatever's needed to get power to the compressor. Some of them are purely electrical and designed so you can't even see them with the hood open... for a price.
Anyway, while we're here, you can see in that last photo that we put the new intake manifold on. (The rag is just to keep stuff from falling into the hole where the carburetor should be.) This is only a temporary fitting. The instructions for the intake gaskets we're using said to stick them down on the head side with RTV or silicone glue, bolt on the manifold until the glue dries, then take it off to install the front and rear seals, so next time we'll be taking it back off to do that. We also need some more suitable bolts. The heads on these, which are just standard bolts out of our hardware bins, are too big to get a wrench on in a couple of places.
So that's the plan for next time--manifold off, do the end seals, manifold back on. Once that's on it'll be safe to invert the engine again, and we can finally put on the oil pan.
It's really coming together now. Won't be that many more sessions before we have to think about installing it. We were originally going to build an actual test stand, with cooling and fuel systems and all that jazz, but then we realized we already have a perfectly good one sitting over in the corner of the garage.
--G.
-><-
Benjamin D. Hutchins, Co-Founder, Editor-in-Chief, & Forum Mod
Eyrie Productions, Unlimited http://www.eyrie-productions.com/
zgryphon at that email service Google has
Ceterum censeo Carthaginem esse delendam.

 Printer-friendly copy


