Session 6: May 19, 2019
They See Me Wirin'Previously on Project Impala: We finally got everything on the Before Start Checklist done, but when we turned the key, absolutely nothing happened. We closed out the session wondering whether the problem could be with the voltage regulator.
You know how sometimes you put a thing together, and at the end you realize you have an extra piece, but you can't think what it's for?
Well, this week, as we got started, we cleaned up the work table and came across this.
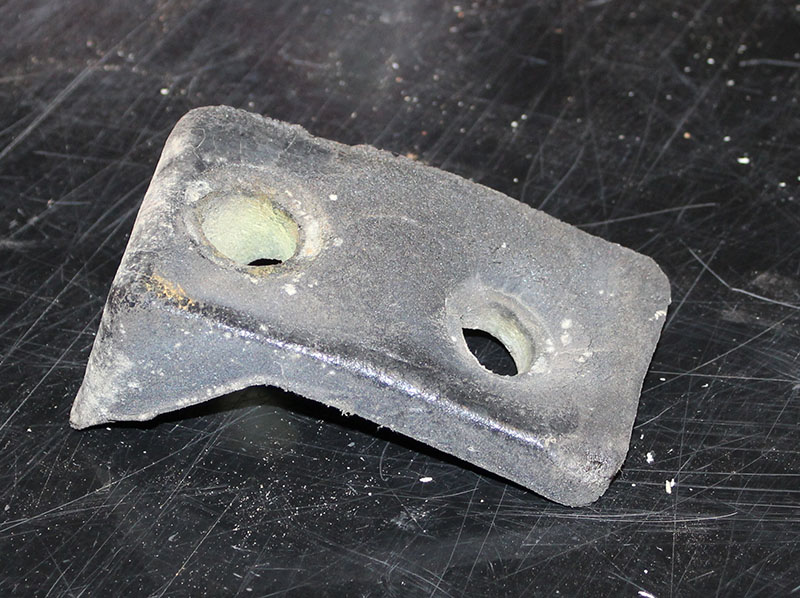
Fig. A ♪ mystery foam, get ready for your mystery foam ♪
Turns out, this is part of that complicated heater core setup from last week. This gave us a moment's dread, since that was a huge pain in the butt to put together, but fortunately, we didn't have to dismantle anything to get the foam thing in place. It goes on where the hose fittings come out of the box on the engine side of the firewall, so we only had to disconnect the hoses. We were a bit worried about that too, given that we've put two gallons of coolant in the system, but since the engine hadn't turned over yet, it was all still in the radiator and everything was fine. An easy fix to start the day.
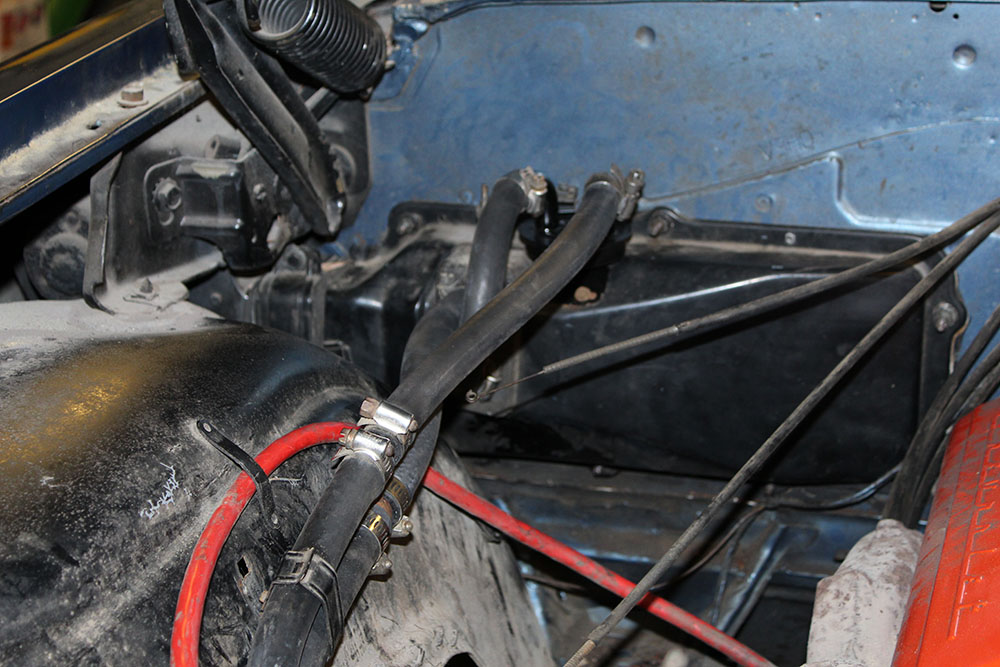
Fig. B I guess it's to keep air from leaking around the hose fittings.
With that loose end tied up, we turned our attention back to the electrical system. Over the course of the week, I got an email from a reader suggesting a couple of other possible sources for the problem, and since there's not a hell of a lot to be done with a failed voltage regulator other than order a replacement anyway, we decided when we reconvened this week to have a look at other parts of the system. To that end, we dug out the 1962 supplement to the 1961 full-size Chevrolet shop manual (because the '62 was basically just a facelifted '61, they didn't bother printing a complete shop manual for that year) and consulted... the wiring diagram.
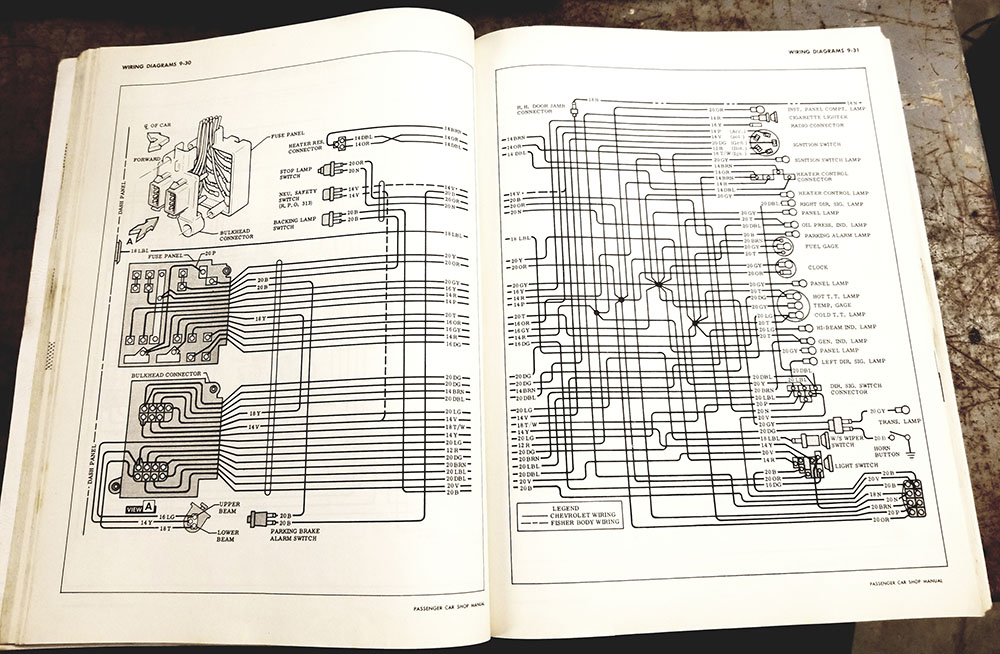
Fig. C good luck, Space Force
This is pages 2 and 3 of four, and it's actually not as bad as it seems. The course in electrical engineering I took was a long time ago now—almost nine years—but I remembered what most of the symbols mean, and the actual organization of the diagram became clear after a short period of puzzled study. It's laid out as a top view, with the front of the car on the left. This is less obvious looking at these two pages, but comes into focus when you see that the first page starts with the headlights on the left, and the fourth page ends with the taillights on the right. Pretty clever, really.
This spread starts at the firewall; those two large blocks at the lower left are the cabin side and engine side of the main electrical junction box, which is mounted on the firewall in the driver's footwell. The side facing the cabin has the car's fuses and places to connect various accessories that were optional in '62 (such as the radio); the side facing the engine compartment has two large multi-pin connectors which protrude through holes in the firewall. There are two wiring harnesses forward of the firewall, one for various engine systems and the other for the lights and whatnot. Each has one of those connectors on it, and the part of the wiring diagram in the lower left shows their pinouts.
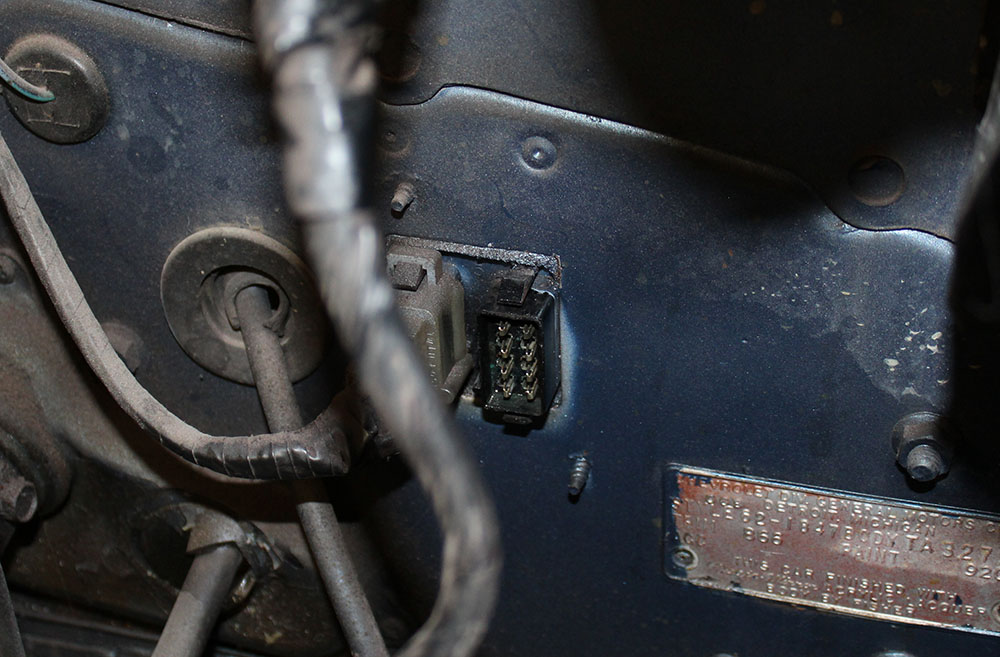
Fig. D compatible with absolutely nothing else
The engine harness (on the driver's side) is unplugged; the other one is partly hidden behind the unplugged engine harness pigtail. The thing coming through the round grommet to the left is the speedometer cable (the speedometers in these cars are mechanical, driven by a takeoff from the transmission).
We had this unplugged for a reason, namely, the wires from the starter solenoid to the ignition switch go through there. More about this in a minute.
In the '60s, the ignition switches of GM cars (and indeed most cars) were on the dash. They moved to (what is now) the customary spot on the steering column in 1969. The '70s-and-later version of this arrangement has a bunch of security features built into it—the key unlocks the actual steering wheel along with turning on the ignition, and can't be removed while the car is running. They were also designed to be harder to remove (not that that ever stopped a car thief).
To remove the key lock part of the ignition from a 1962 Impala, here's all you have to do:
- Turn the key to LOCK (which just locks the ignition, not anything else in the car);
- Poke a wire or a small drill bit into a tiny hole next to where the key goes on;
- Turn the key back past LOCK, into no-man's-land;
- Pull out the whole lock mechanism.
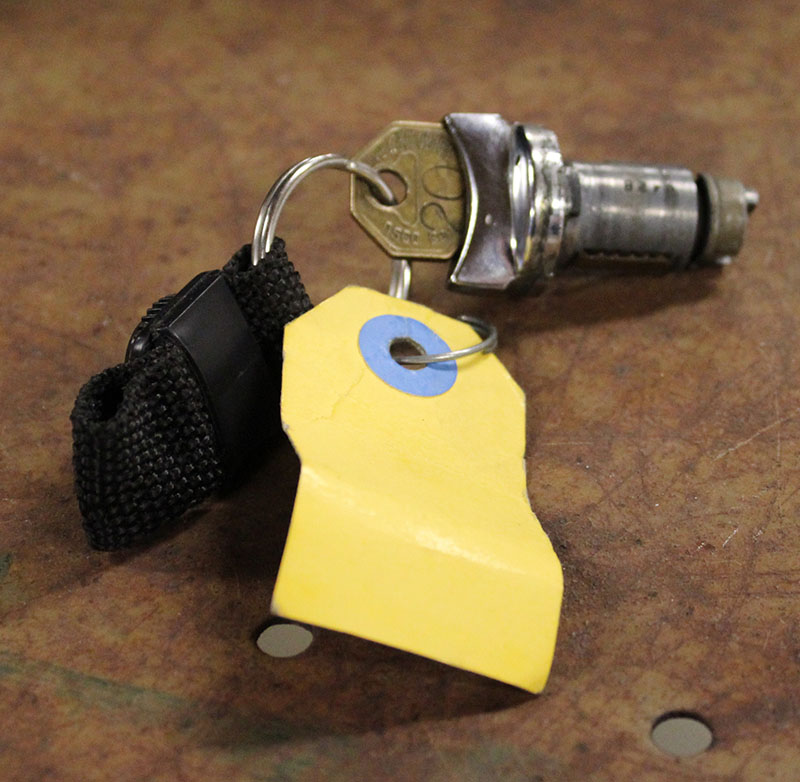
Fig. E Easy!
At this point, the ignition switch itself is still attached to the dash with a decorative chrome nut. To get it off, that nut must be unscrewed—but because it's also a decorative part, it isn't shaped to get a wrench on it.
Here I will make a brief diversion to discuss one of the annoying features of automotive shop manuals. The official kind, I mean, not like the Haynes manual for whatever kind of car you have. The OEM ones were never intended for the general public; they were prepared for the reference of dealership service departments. This means they generally are exhaustively detailed and have lots of incredibly useful information in them you can't really get anywhere else...
... but they also assume you have every specialized tool ever issued to Mr. Goodwrench by GM HQ, so you find yourself confronted with instructions like "use Tool J-7607 to remove ignition switch bezel nut."
In this instance, that's a special spanner wrench that slots into the decorative-looking finials on the bezel nut and turns it off or on, but fortunately, it's not really needed. A pair of water pump pliers with some tape on the jaws would do just fine, or, as in this case, the last person to tighten it might not have done it very diligently, so you can just unscrew it with your hand.
Once pulled out, the ignition switch has to be removed from a plastic housing intended to prevent access to the wires on the back of it. This is described in the actual service manual as a "theft-resistant" feature. In order to get around it, you have to...
... pry the housing off with a screwdriver.
Theft-resistant. Because a car thief might not have a screwdriver!
Anyway.
With the wires exposed, we could get the multimeter in there and test whether we were getting voltage to various places. One of the wires connected to the ignition switch is live at all times (hence the term "hot-wiring"—you're literally pulling out the hot wire and the wires at the other side of the connection the switch would normally make, and connecting them together manually to bypass the switch), so if we could get >12 volts on that wire at the switch, we would know the switch wasn't the problem.
We couldn't, but there was some voltage there, which was... odd. After tracing around on the diagram for a while, we figured out that that's one of the wires that goes through the firewall in one of those large connectors, unplugged it, and investigated.
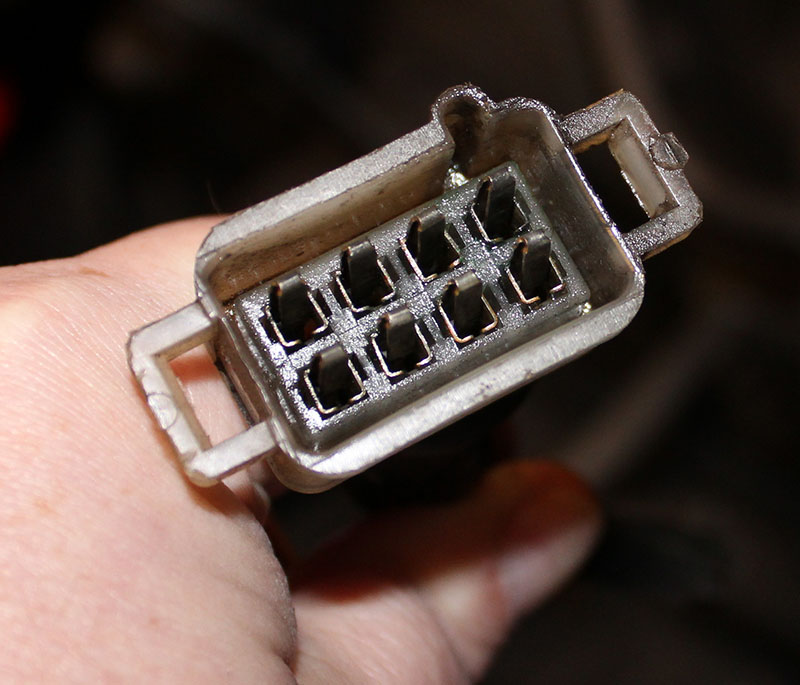
Fig. F Well there's yer problem.
So... that's been cleaner.
Off to the Shelf of Various Sprays we went, in order to look for contact cleaner.
Aero Kroil: Super handy! But not contact cleaner.
Liquid Wrench: Almost as handy as Kroil! Not contact cleaner.
WD-40: How many of these very similar products do you need? Not contact cleaner.
Starting fluid: Bad for engines, says Dad. So why does he have it? Who can say?
Lock de-icer: An orphaned product, no longer useful in the age of keyless entry.
Raid: RAID?!
Another can of Raid: Must have had some hornet problems.
ANOTHER can of Raid: Come on, now.
And indeed a fourth can of Raid: My father basically forgets he already has some Raid every time he encounters a hornet nest.
Rust-Oleum: Satin black.
Wire Dryer: Close! But not contact cleaner.
... So we had to go to the hardware store and get some contact cleaner, which we applied liberally to the bulkhead connectors and then went to have some lunch.
When we got back, we found 13.5 volts at the ignition switch! Huzzah! But still the starter would not do anything.
Next, further hunting around on the wiring diagram revealed a wire from the ignition coil (the high-voltage transformer that supplies power to the distributor, which sends it to the spark plugs) to the starter solenoid. Apparently the solenoid in this model engine needs both its regular power feed straight from the battery and a shot of high voltage from the core? Dad didn't remember this being a thing, but he hasn't worked on one of these engines for a while, so, OK. We went back to the car and searched for the wire in question.
Eventually, we found it, leading from the ignition coil to...
... nowhere. The other end was missing.
At this point, we realized that when Dad replaced the automatic transmission the car had when I bought it with a manual, he had to remove the starter (which is attached to the transmission bell housing at the back of the engine), and when he did, that wire broke. Since he did that in 1999, I suppose I can't fault him too much for forgetting about that detail.
That meant hunting up a new connector—in fact, new connectors for both ends, since the end at the coil was frayed and nasty—and refitting the wire. In the process, we discovered, not entirely to our surprise, that the 58-year-old wiring under the Impala's hood has gotten very brittle with age; the insulation cracks with any manipulation of the wires, and the conductors beneath are corroded. Basically the whole system is a fire waiting to happen.
So, it looks like we're going to have to completely re-wire the car at some point in the near future.
Fortunately, a number of vendors sell complete prefabricated wiring harnesses for these cars, with modern materials and connectors, and often with various long-standing design flaws fixed and provisions added for add-on features (many are prewired for adding air conditioning, for example). They're a bit expensive—$400 for one of the more basic engine harnesses, up to a grand or more or the really fancy full-car rewiring kits—but still, it's cheaper than a garage fire.
I'm not really looking forward to that part of the job. Automotive wiring, as the above description of various tasks thereunto pertaining may suggest, is a pain in the butt.
Anyway, with that problem tracked down and fixed, we tried again... and got nothing. That was disappointing, but a few moments later we realized that we were in fact getting less than nothing. Before we reconnected that wire, the various live bits of the electrical system read approximately 13.5 volts DC everywhere, and responded to no provocation.
Now, with the coil-to-solenoid wire reconnected, the "hot" wire at the ignition switch read 13.5 with the key in the OFF position (which shuts down all the car's electrics except the things that are live 24/7 by design, like the ignition switch itself, the cigarette lighter, the switch for the headlights, and the horn)... but with the key in the ON position, which is supposed to power up the ignition system, the starting circuit, and accessories like the heater blower and the radio, voltage on the ignition hot wire dropped to less than two volts.
Now very puzzled, we started investigating other points in the system, and found that with the key ON (not at START, which interrupts most electrical systems in order to give full power to the starter, but ON), there were sub-2V voltages everywhere... including across the terminals of the battery.
That battery had a bad cell. Just sitting there with nothing being asked of it, it supplied 13.5 volts, but the moment there was the slightest load, it dropped below two. That's not enough electricity to twitch a dead frog's leg,* let alone energize any part of an automobile.
At four o'clock on a Sunday afternoon in northern Maine, your options for acquiring a new car battery are somewhat limited. We thought about packing it in for the week at that point, but... I mean... we had a definite problem identified, we'd been working on it all day, and we felt so close.
So we drove over to Bangor and bought a new battery at Sam's.
Don't judge us.
Back at the Project Impala Technology Center after what was almost certainly the shortest visit to a warehouse club ever made, we dropped the new battery into the car, tightened everything up, and prepared to see what was what. I made ready with the multimeter and kept an eye on the oil pressure gauge. Dad climbed aboard and turned the key to ON...
... and the heater fan started running.
That never happened before. We didn't realize it was even switched on, since we haven't actually gotten around to reconnecting the heater controls yet.
There was a short, bemused silence. "... The blower's running!" said Dad from inside the car. He knew I knew that already, since it's in the engine compartment and I was standing there with the hood open, but it was just so... unexpectedly positive, that we both had to kind of take it in.
And then...
... the moment.
Now, I will grant you, this isn't a terribly impressive piece of video footage. (SPOILER: The car doesn't even start.) But given how long, and how much troubleshooting and futzing around, it took us just to get to the point where the car would do this much, I think it's worth a moment's reflection. This, as I have said before, is life with old cars: You bust your ass for days (we'd have been at this for a week, basically, if we'd worked on it every day instead of just one day per weekend), and you feel like celebrating when you get it to the point where it even tries, however unsuccessfully, to start.
We weren't expecting it to start on the first crank-over, anyway, because the fuel lines and the carburetor were empty; but after a few more attempts, we realized that it wasn't going to work the remaining issues out on its own. Again, not entirely surprising given how long it's been sitting.
The next candidate for trouble was the ignition system, since the engine was turning over, but not even attempting to fire. Fortunately, there's an easy way to check for this: you take out one of the spark plugs, leave it connected to its wire, lean it against the engine so it's grounded on the block or the exhaust manifold, and crank the engine. If the plug sparks, you'll see it.
We didn't.
Replacing the grimy old plug with a new one didn't remedy the problem, but that in itself was helpful, because it told us the problem was unlikely to be the plugs themselves. The next step was to take apart the distributor, which is that thing that sits on top of the engine with all the wires coming out of it:
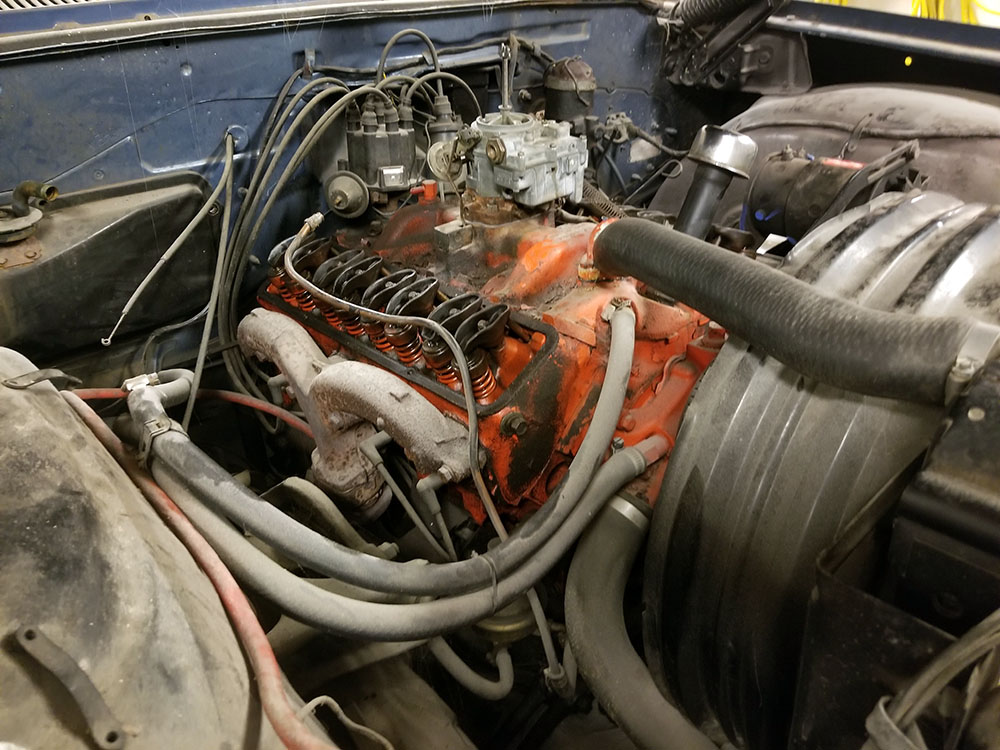
Fig. G Flashback to a previous episode! Woo!
That's the distributor at the back. Note the coil, that black cylinder next to it, partly obscured by the carburetor. There's one wire going from the coil to the center of the distributor, and eight more in a circle around the distributor cap. The wires on those terminals go to the spark plugs. Inside the cap is a rotor, which is driven by the camshaft (the same internal engine part that controls the intake and exhaust valves on the cylinders). As it turns, it makes and breaks contact with each terminal, sending power to each spark plug in turn, which ignites the fuel-air mixture in each cylinder and makes the car go. (And yes, the engine only works properly if this very delicately timed set of operations is exactly right. We'll get into that later on in the project.)
I didn't get any photos because it was quite late by then and I had to get home, but we found, not entirely unexpectedly, that the insides of the distributor were pretty badly corroded. We'd have to get new electrical bits, rebuild it, and try again.
Those parts are now on order, and so that will probably be the order of business next session. We really want to have the engine at least nominally running before we start what is sure to be the long and involved process of rebuilding the brakes.
All in all, a slightly disappointing outcome, but a good session. Lots of detective work and sequential problem solving. I'm going to keep coming back and banging on about this over and over again throughout the course of this project, but it always pays for me to keep it in mind as much as my theoretical audience: This is how things go with these cars.
I should probably just work that up into a Project Impala Manifesto and make it a read-this-first. :)
--G.
* Well, OK, it might be, I'm not a biologist. It's a clear analogy, though.
-><-
Benjamin D. Hutchins, Co-Founder, Editor-in-Chief, & Forum Mod
Eyrie Productions, Unlimited http://www.eyrie-productions.com/
zgryphon at that email service Google has
Ceterum censeo Carthaginem esse delendam.

 Printer-friendly copy


 RE: Project Impala: Session 6
 RE: Project Impala: Session 6