Today: pistons!Like the main bearing caps, the connecting rod caps had to be affixed and fully torqued at the machine shop, so that the rods would be under full load when the bearing holes were ground and checked for proper circularity. This means the first order of business was to bust them off again, which involved a vise, a socket wrench, and some careful wrapping with a towel. We need to get some brass jaws for our bench vise...
Anyway, we got them off, at which point the task of installing the piston rings began.
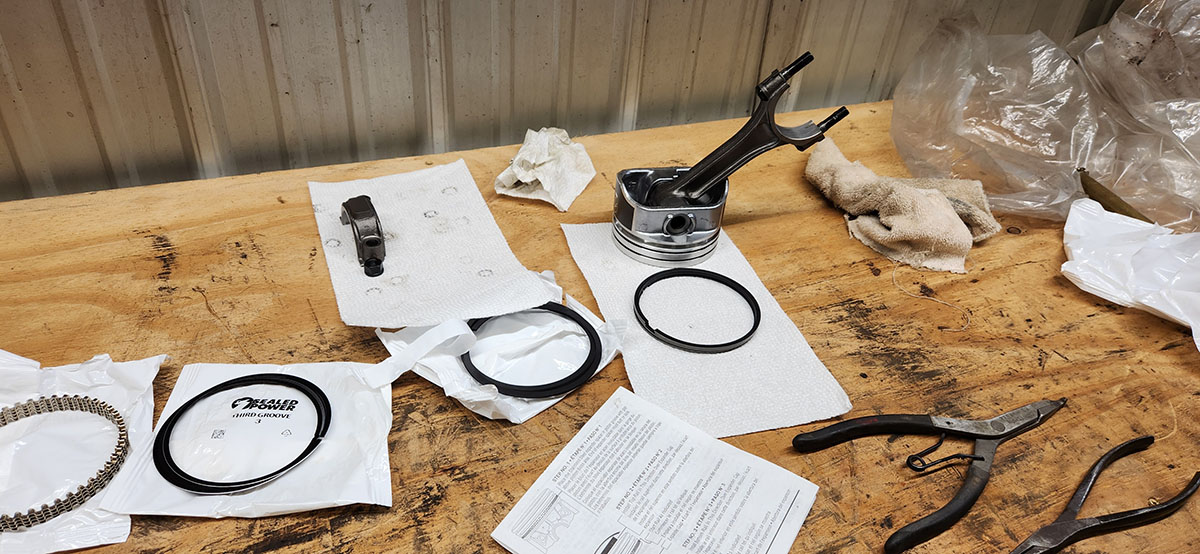
SBC pistons have three rings, or five, depending on how you reckon it. Two of them, in the top and second-from-top grooves, are responsible for maintaining compression and are quite substantial. Below them is a pair of thin rings separated by that waffly-looking thing on the left. The triple ring's job is to contain the oil, keep it from sneaking up into the compression chamber, and scrape it back off the cylinder walls on the way down.
The oil-ring set is easy to put on by hand. The compression rings... less so. You're really supposed to use a specialized tool like a pair of pliers to spread them for installation, but we don't have one (you can see there where we tried a couple of similar tools we did have on hand, but they didn't really work), so that operation was a bit of a finger-buster. Since I'm currently in a neurological state where the feeling in my fingertips is attenuated except for pain, that was... fun. But we got it done without breaking any rings!
You'll occasionally see writeups or videos with exhaustively specific recommendations for how you should clock the ring gaps, which is kind of silly, since if they're working properly they rotate freely the whole time the engine is running. All you can really do is make sure none of them line up with each other when you install them, so that there isn't a direct channel from crankcase to combustion chamber. Once in operation, the spin may occasionally line up that way just by chance, but it won't stay that way for long.
Once ringed up, it was time to install the pistons. I didn't get many photos of this, because a) I was busy putting them in and b) the process involved liberal applications of assembly lubricant, and I didn't want to get it all over my phone.
In particular, I failed to get a shot of the ring compression tool, which is a slightly tapered collar you put on the piston as it's going into the engine block. As its name suggests, this compresses the rings as you thump the piston into place with a hammer handle, so they don't get hung up on the block deck. Meanwhile, with your third hand (or, ideally, a helper's attention down below), you have to guide the connecting rod so the studs don't hit the crankshaft journal and mar the machined surface. These things are surprisingly delicate for huge chunks of cast iron.:)
Once the rods are properly positioned, it's time to install the bearing shells in the rods and caps. These are basically smaller versions of the ones we've already seen for the main bearings, with the same little tabs to make sure they're properly positioned. When the bearings are in, the pistons can be driven fully home, which looks like this (these are the pistons in numbers 1 and 2 cylinders, at the front of the engine):
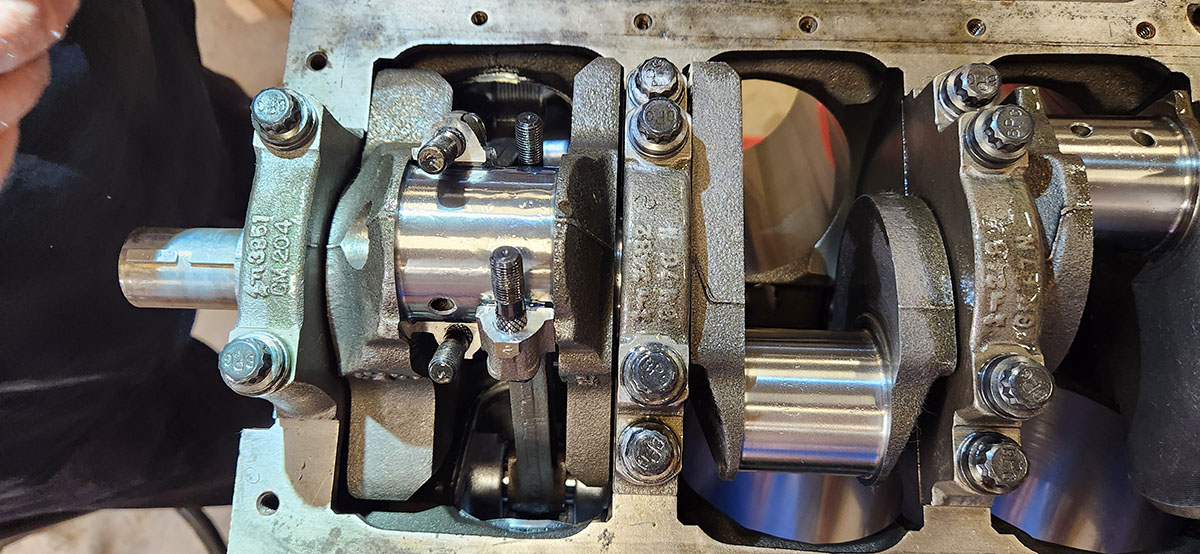
Once they reach this stage, they can be capped and the nuts torqued down. Then give the crankshaft a turn to make sure everything is interacting as it should, position the next rod bearing journal at the bottom, and repeat. When it's all done, the bottom end looks like this:
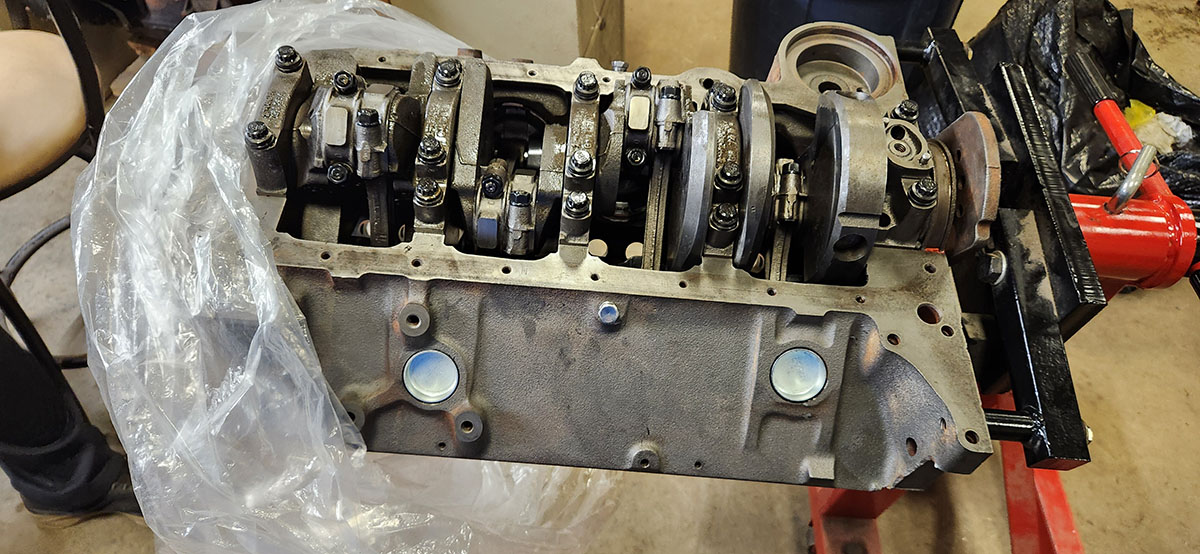
It gets a little harder to turn with each piston pair you install, but even with everything together, this type of engine should require no more than 30 to 40 pounds-feet of torque to rotate. I put a torque wrench on a bolt in the front end of the crankshaft and tested it after everything was together, and it was just about bang on 30. This is great, and indicates that a) we used enough assembly lube and b) all the bearing surfaces are slick and properly aligned.
Artsy shot of the driver's side deck with number 1 piston installed!
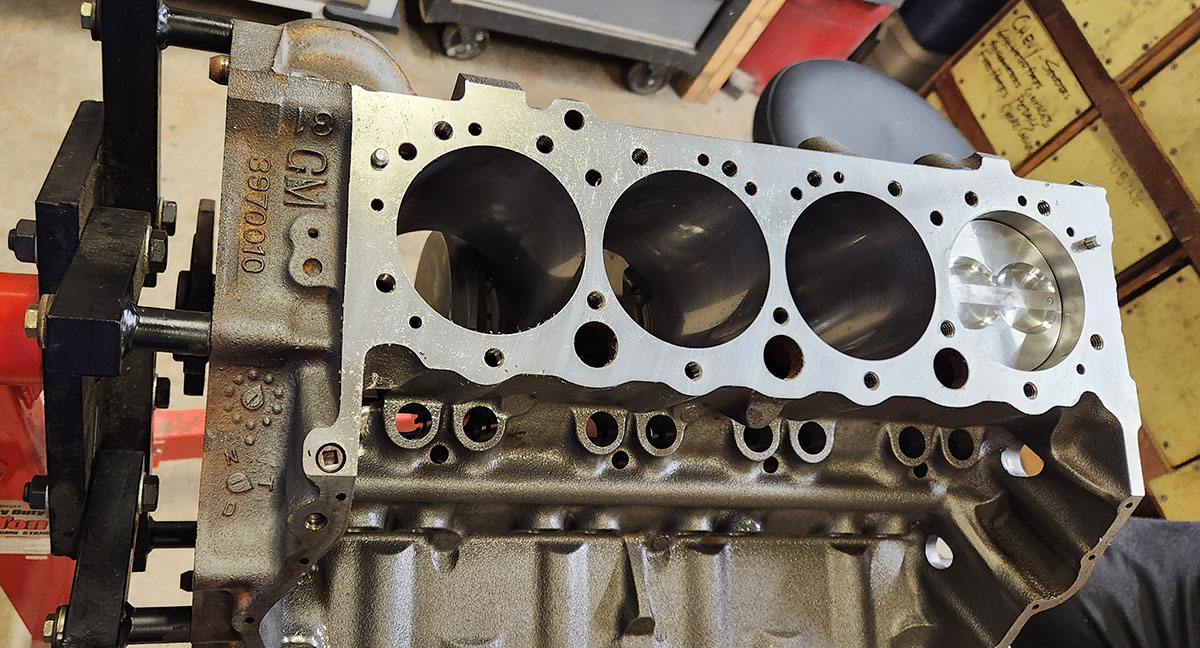
And here are a couple of very satisfying photos of the two sides of the block with all the pistons installed.
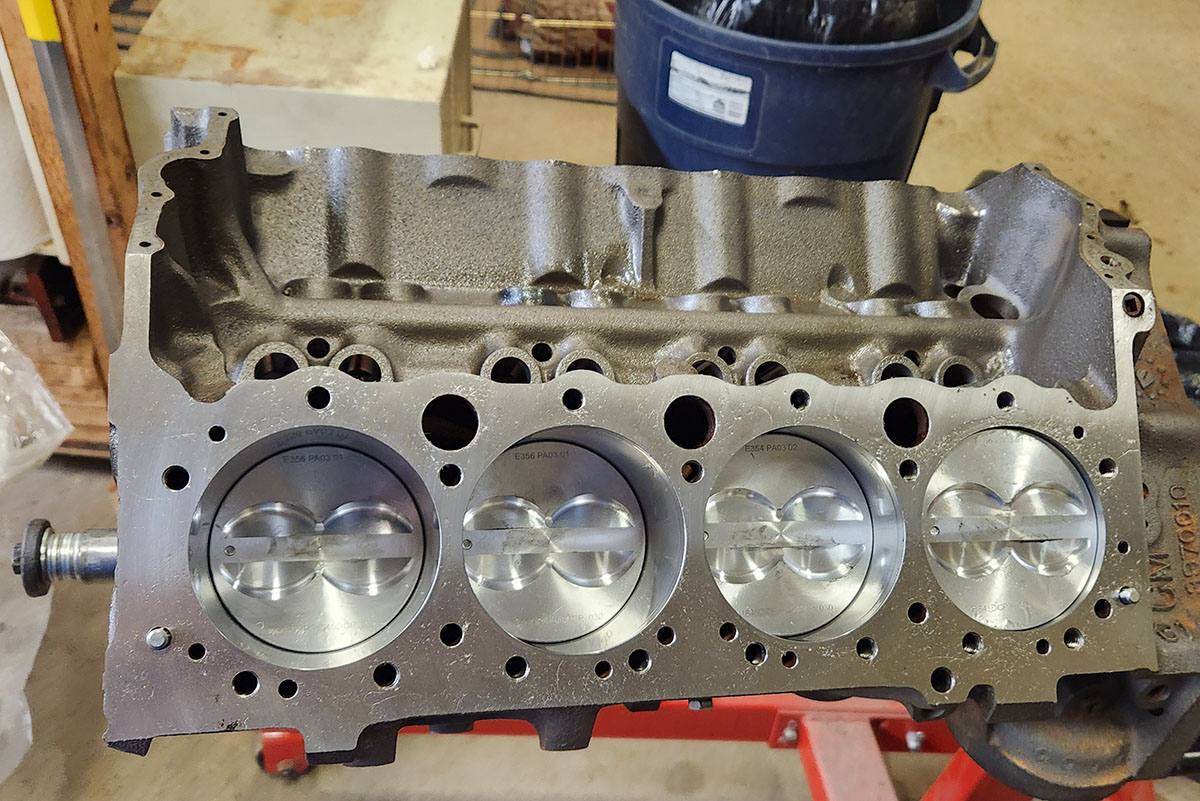
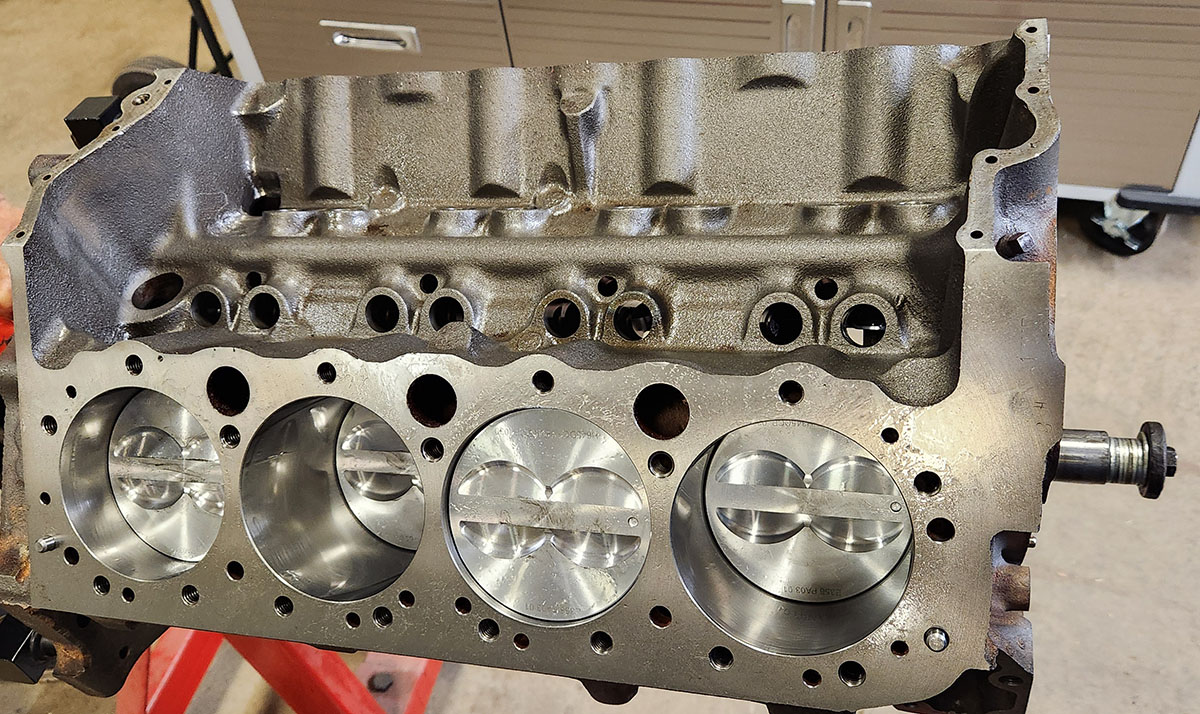
Such beautiful, shiny pistons. It almost seems a shame to run the engine and get them all carboned up...
These pics also give a good view of the valve reliefs in the piston faces, and the little circular marks indicating which side is supposed to be toward the front. (And the bolt I put in the crankshaft. :) Only two of the valve reliefs in any given piston are actually doing anything, since this is a 16-valve engine. The others are just there so the set can have eight of the same casting in it, which keeps costs down (relatively speaking).
This was a full afternoon's work for Mr. Fumbles over here, and I was pretty wiped out by the end (partly because it was hella muggy today), but I got it done! Next session it'll be time to install the oil pump, camshaft, timing chain and gears, timing cover and oil pan, and balancer--basically everything below the decks. And then... cylinder heads. Lifters, pushrods, rocker arms... adjusting 16 valves... adjusting 16 valves again... and probably again...
That one's gonna be a long day. :) In between, we might take a break to do some more shop arranging.
--G.
-><-
Benjamin D. Hutchins, Co-Founder, Editor-in-Chief, & Forum Mod
Eyrie Productions, Unlimited http://www.eyrie-productions.com/
zgryphon at that email service Google has
Ceterum censeo Carthaginem esse delendam.

 Printer-friendly copy


 RE: Project 350 Session 2
 RE: Project 350 Session 2