LAST EDITED ON Jul-09-19 AT 04:36 AM (EDT)
Session 9: June 26 / July 2, 2019
Houston, We've Had a ProblemPreviously on Project Impala: We installed the new disc-brake hardware on the passenger side front wheel hub! By far the most visually dramatic progress on the project to date.
This session was actually two partial ones, wedged in when we had a few hours to spare on a couple of different days last week and the week before. Because of the limited time, we had no specific agenda for either one, but were just trying to see what we could get done in the time available.
On June 26, our main goal was to test out a new tool. Earlier, when we got the engine running and were trying to tune it up, we found that both Dad's old dwell tachometer and our electrical multimeter were acting a bit odd, so in the interim, we bought a new tool that replaces both:
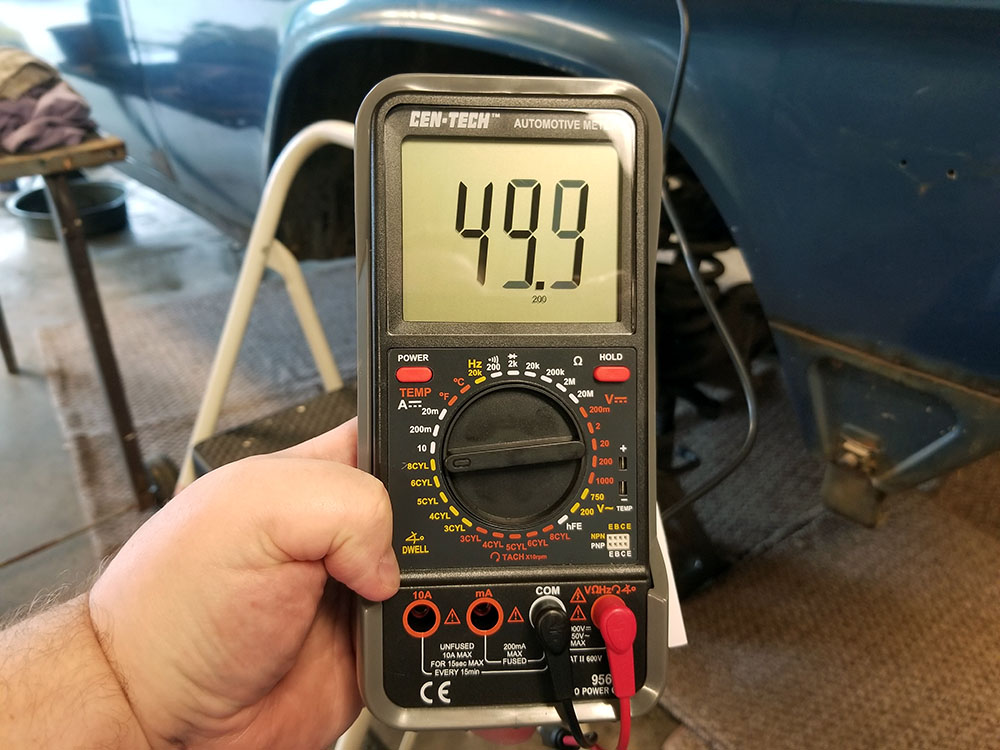
Fig. A technology!
This device does all the usual multimeter things and, if you connect it properly, can measure dwell angle and RPM. Note that this picture was taken with the leads disconnected, so that's showing the maximum displayable dwell value at the 8-cylinder setting. The optimum dwell angle for a smallblock Chevy V8 is between 28 and 32 degrees, and the Impala wasn't that far off. With the aid of the new meter, we got both it and the idle set just about as well as we're going to. The timing is always going to vary a little (we think the distributor cam is worn enough that it's slightly out of round), but it works well enough to get a nice smooth idle and revs without threatening to stall. Not bad for an engine with indeterminate mileage that's been idle for 20 years!
However, there are still a few problems with it...
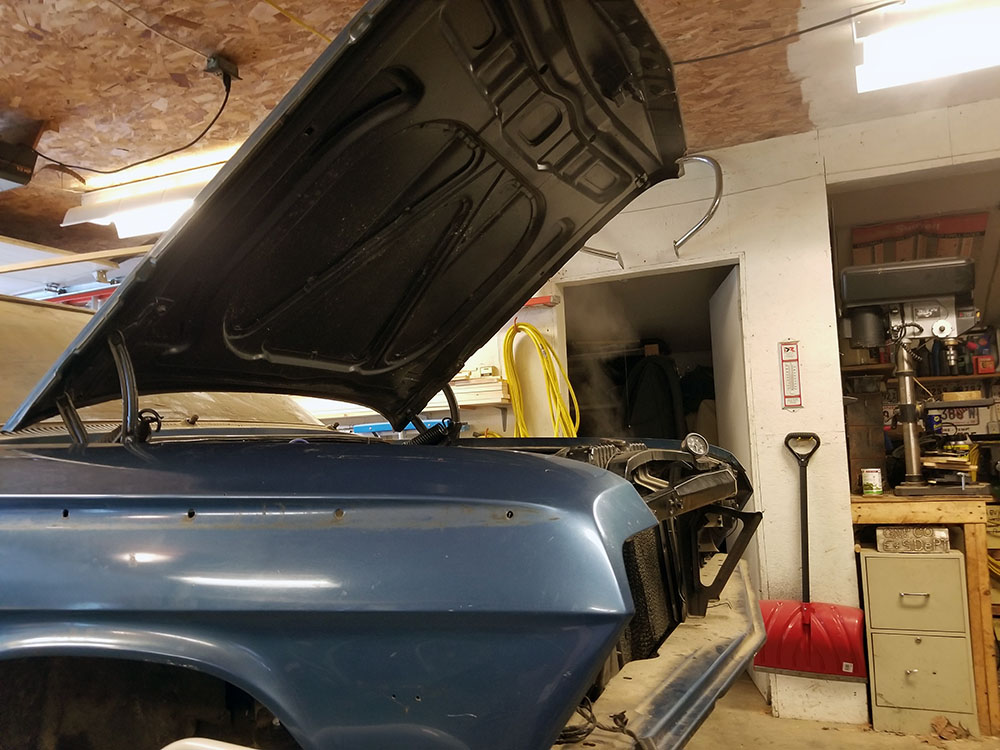
Fig. B Could be a problem with the liquid helium, or maybe the superconductors.
... most prominently the fact that, while we were idling it to adjust the dwell, the engine overheated. It didn't outright boil over, but hot coolant started dumping out of the overflow (in these old engines, that's just an outlet, it doesn't go into a bottle like in modern cars—very environmentally friendly), and when Dad unlocked the radiator cap, a fair amount upwelled out of there, too, along with the cloud of vapor you can see in the photo above. That might have been at least partially because we had overfilled the system (it's not an exact science), but we suspect the thermostat may be stuck. That's not an uncommon failure state in these engines, particularly if they've been sitting for a while (and this one has) and the owners didn't drain the system (and we didn't). It's a fairly easy part to replace, so we'll go ahead and do that, then see if we need to investigate further.
When we reconvened on July 2, we decided to see how much more of the brake conversion stuff we could get mounted in the time available. First, the driver's side front wheel assembly had to be stripped down to the spindle and rebuilt with the new parts, which was just a straight repeat of the process we'd already done on the passenger side. The driver's side came apart more smoothly, without a repeat of the frozen bolt we ran into the first time, and the whole thing went together without a hitch.
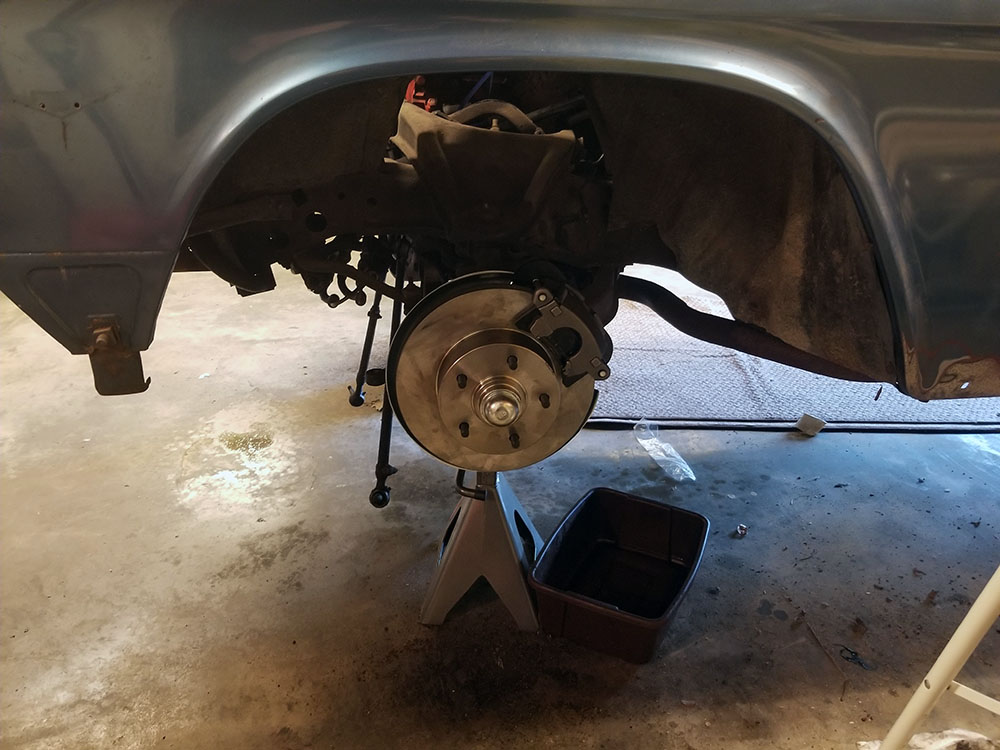
Fig. C Second verse, same as the first. Except the other way around.
With that done, it was time to tackle the part of the braking system that's under the hood. The old single master cylinder can be seen in this picture from a previous session:
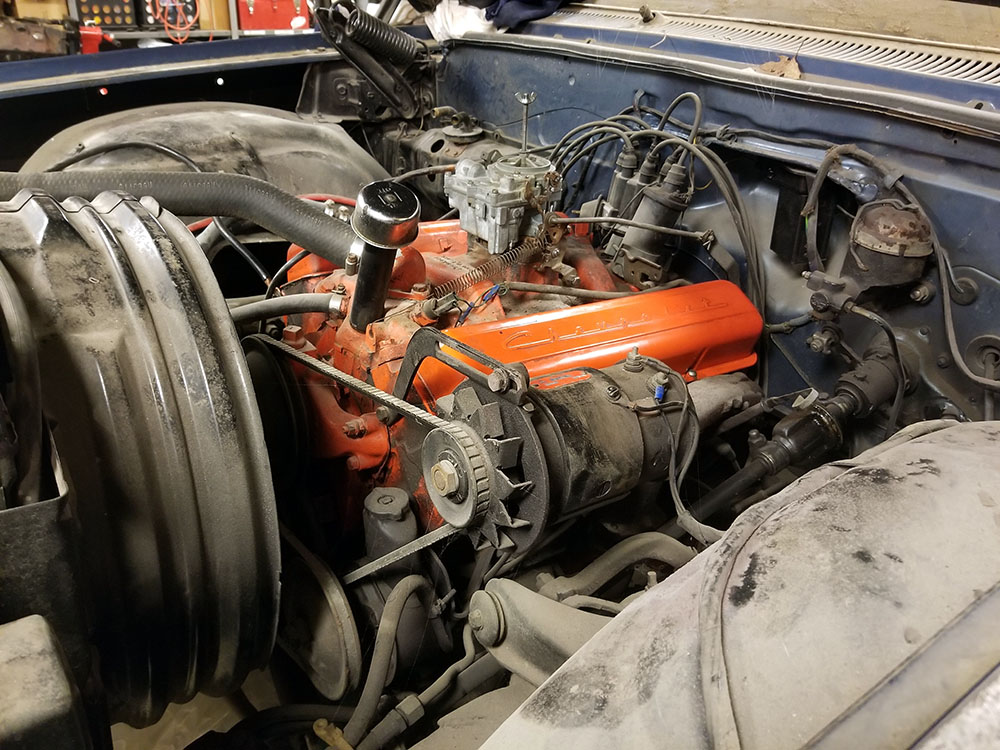
Fig. D This is from before we changed out the distributor and coil.
The master cylinder is that part attached to the firewall in the upper right of the picture, above the steering column. Note the single hydraulic line.
After disconnecting the pedal linkage from the back side of the master cylinder (which is done from inside the cabin, up under the dash), it was an easy job to remove the old cylinder and bolt the new one in place.
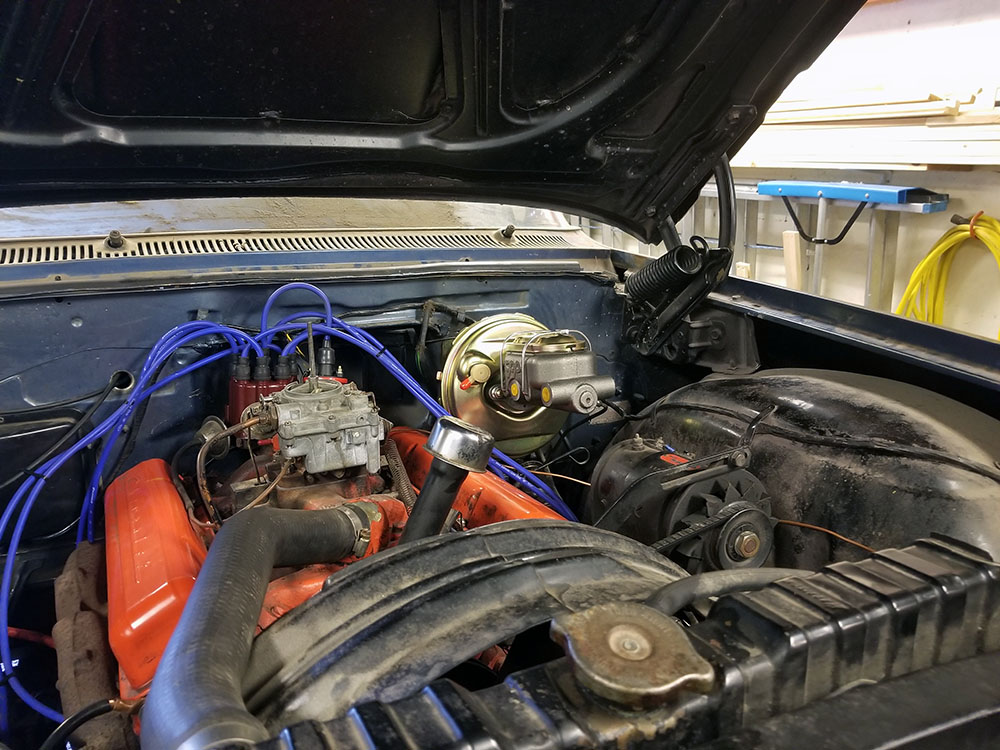
Fig. E shiiiiny
Obviously, this assembly is much bigger than the original. In front, note the double master cylinder; one controls the front brakes, the other the rear. (Paradoxically, because of the way the pedal pressure has to be managed, the one in front is for the rear brakes.) Also of note in this shot is the brake booster, which is the big golden-colored can thing at the back. That will be connected to a vacuum line from the intake manifold with the fitting that is now covered with a red plastic dust cap; it uses manifold vacuum to multiply the pedal force acting on the master cylinders, which means less pedal pressure is needed to achieve the same braking power. Result: ordinary braking is easier, and a full-force pedal stomp exerts more power on the system than an unassisted human leg can put out.
We ran out of time there, so there's still a bunch to be done on the brake overhaul. In addition to all the plumbing (we will have to separate the pipes for the front and rear brakes, which are all a single system now), the proportioning valve still needs to be installed. That will go on a bracket on the left (driver's) side of the master cylinders, and be plumbed in between the cylinders and the rest of the system, to distribute the appropriate braking forces to the front (disc) and rear (drum) brakes. I think I mentioned in a previous writeup that this is needed so that enough pedal pressure to actuate the discs doesn't cause the drums to just lock up, which is a problem that had to be solved before these hybrid braking systems could be made to work in the '60s.
Our next session is scheduled for tomorrow, and odds are we'll be cracking on with the rest of this brake work. We also need to tear down the rear end and replace a bunch of the grease seals back there, reassemble the rear brakes (which had to come apart so we could get at those seals), replace the steering tie rods, figure out where the power steering pump is leaking from and fix that, and dope out that overheat problem, all of which we will almost certainly not get to in one day.
Longer-range, we've been kicking around the idea of replacing the wiring harnesses in the engine compartment. Everything up there seems to be working, but we noticed while getting the engine running that a lot of it is getting brittle, the insulation prone to cracking, which is not what you want. Complete replacement wiring harnesses are available, and although not cheap, they're not amazingly expensive, so we might end up going that way just for some peace of mind.
I feel like I might have said this before, but it probably bears repeating: The thing about the wiring in these cars is that back in the '50s and '60s, an American automobile was built to last somewhere between five and eight years. Detroit's turnover target at the time was three (that is, they wanted the average new-car buyer, who was still tacitly presumed to be a man in 1962, to replace his car every third year), and they weren't expected to last more than two or three owners in the used market.
As such, things like the materials for the electrical components were never specified with the idea that they would go into cars that were still in service 57 years later. (They still aren't today, come to that, although for different reasons.) Electrical wiring and switchgear in older cars is especially prone to entropy, even more so than most of the other parts of the same cars, which is bad, because unlike, say, the door panels or the seat covers, worn-out wiring tends to do things like, at best, stop things from working, and at worst, set the car on fire. So, you know. It's good to keep on top of that.
--G.
-><-
Benjamin D. Hutchins, Co-Founder, Editor-in-Chief, & Forum Mod
Eyrie Productions, Unlimited http://www.eyrie-productions.com/
zgryphon at that email service Google has
Ceterum censeo Carthaginem esse delendam.

 Printer-friendly copy


