The last two shop sessions have really been one task, and the previous one blended in with adding the new bits to the lift, so it's all a bit of an organizational muddle, but anyway. Let's get into it!With the '66 pickup on the lift (see the other thread), we we able to take better stock of the situation down below. It's... bad, but not as bad as it could be.

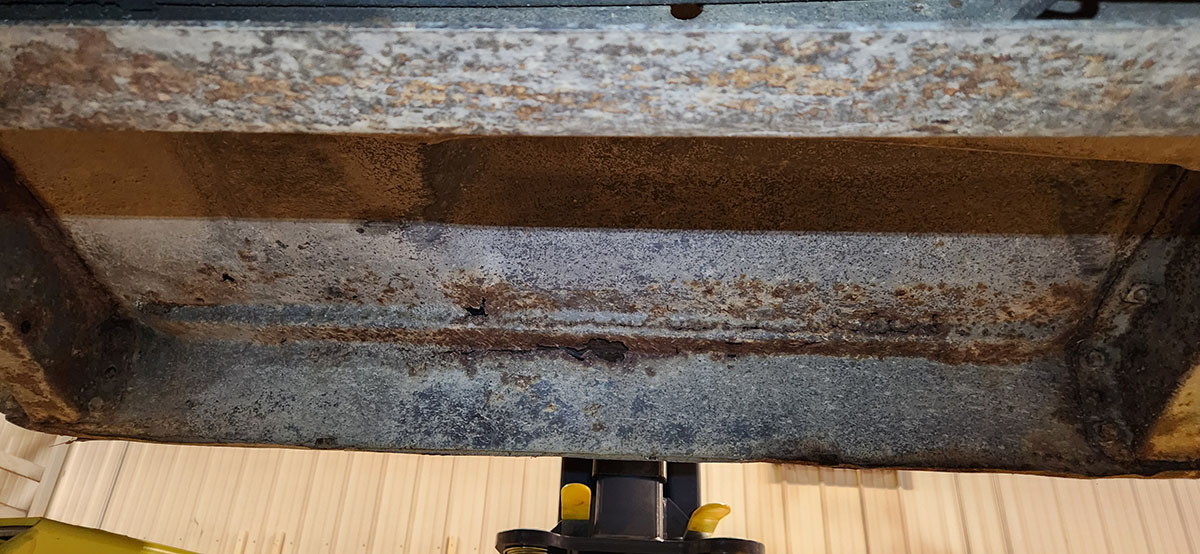
The underfloor is looking pretty ratty, but we knew that.
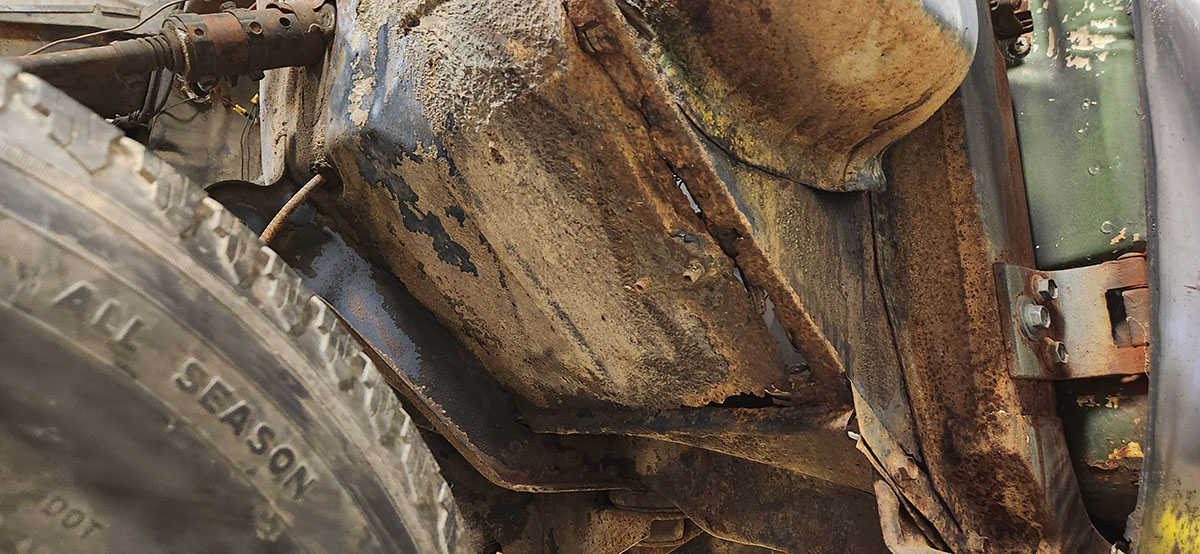
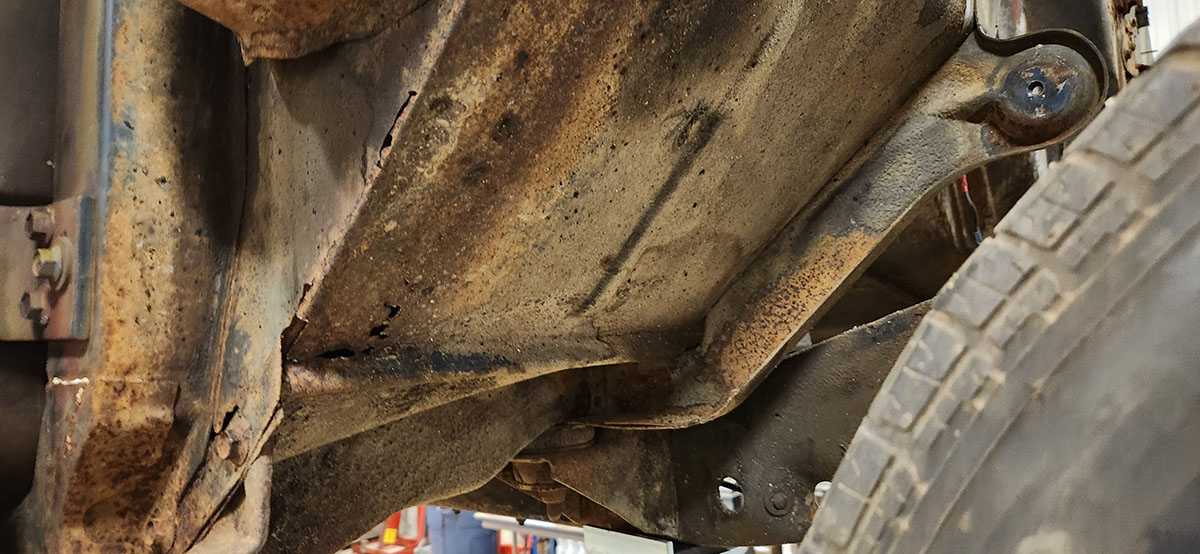
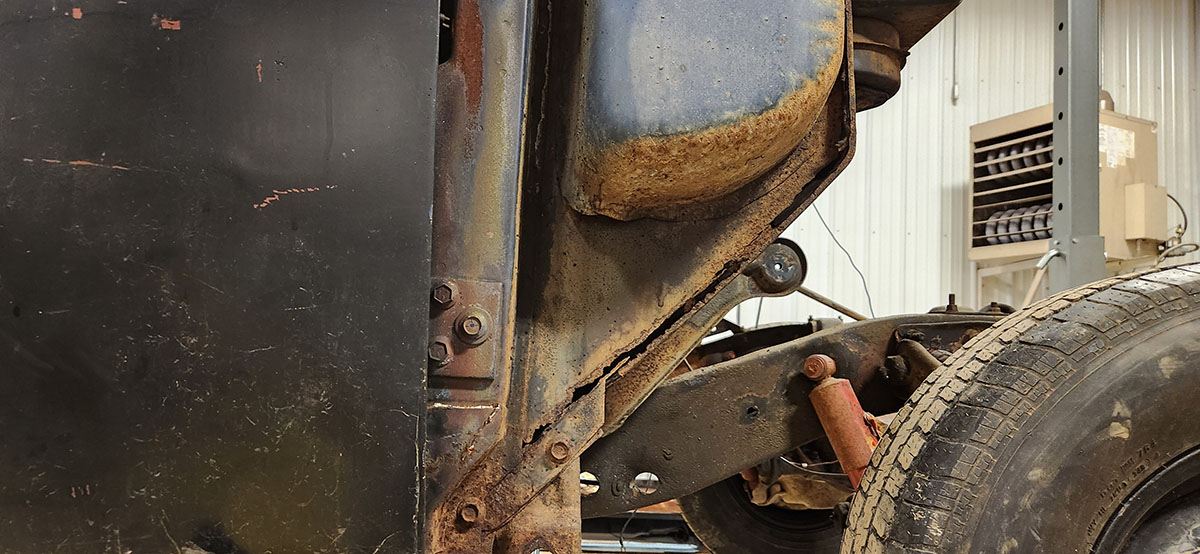
Apart from the holes developing at the seams, the footwells/front corners really don't look too bad.
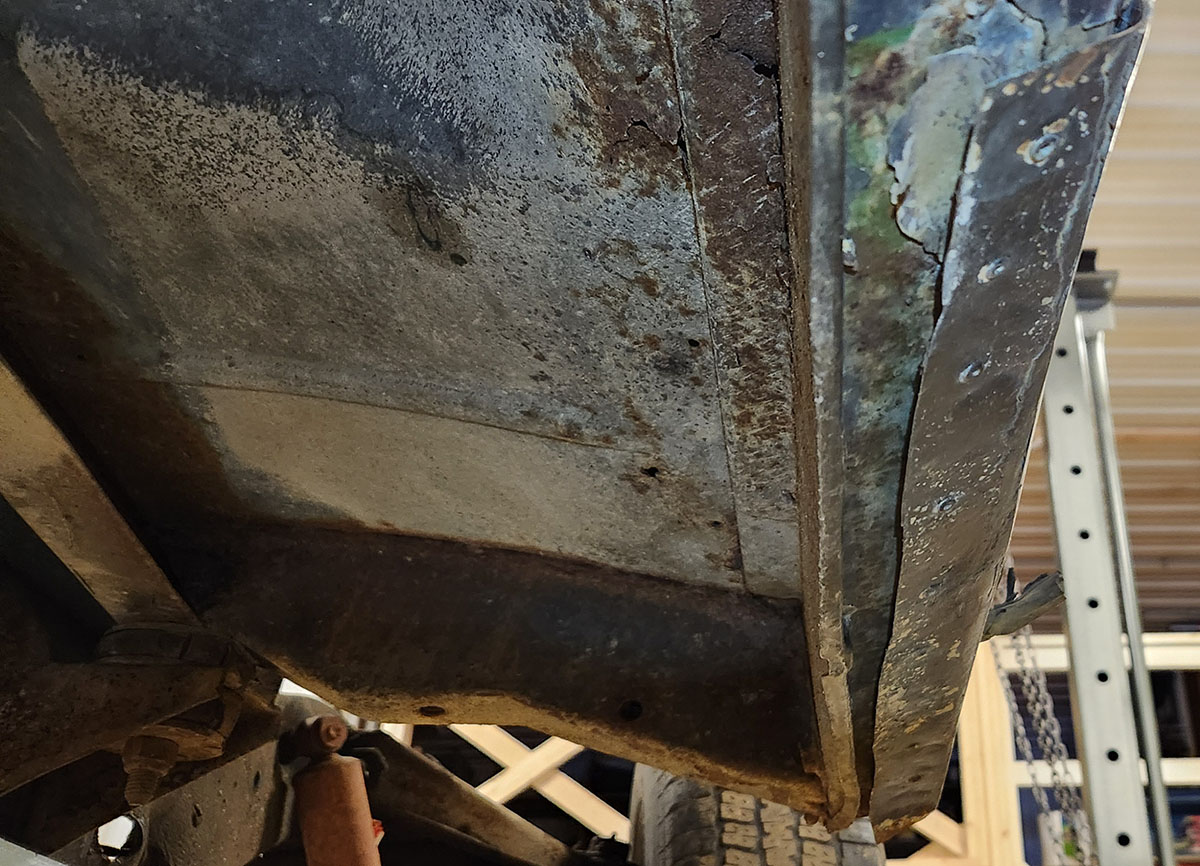
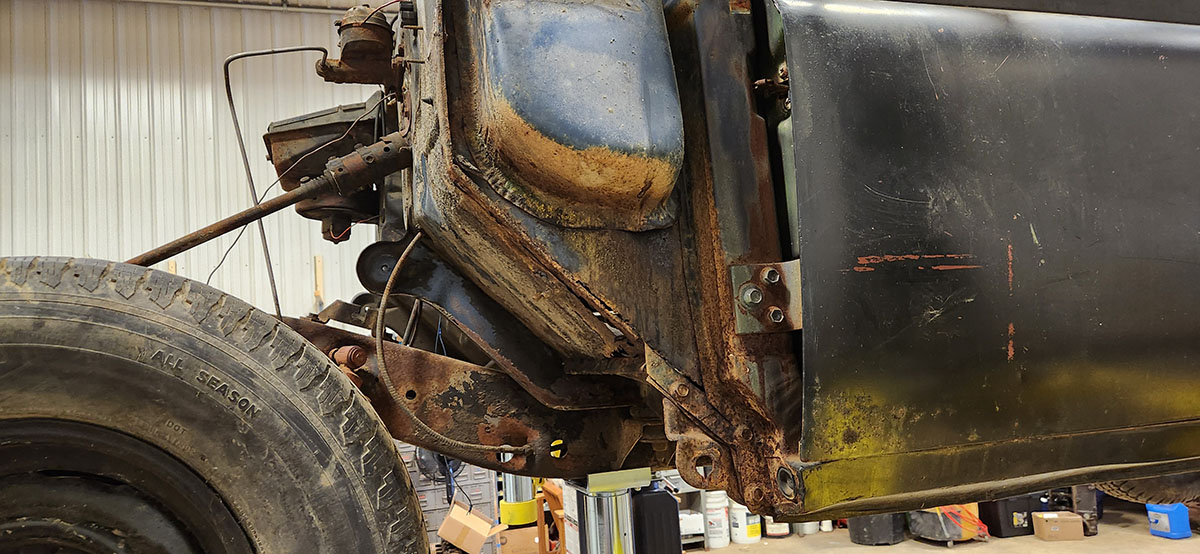
This is probably the worst of it--it's an old, bodgy repair to the passenger side door sill. So old we probably didn't do it! This vehicle contains many mysteries.
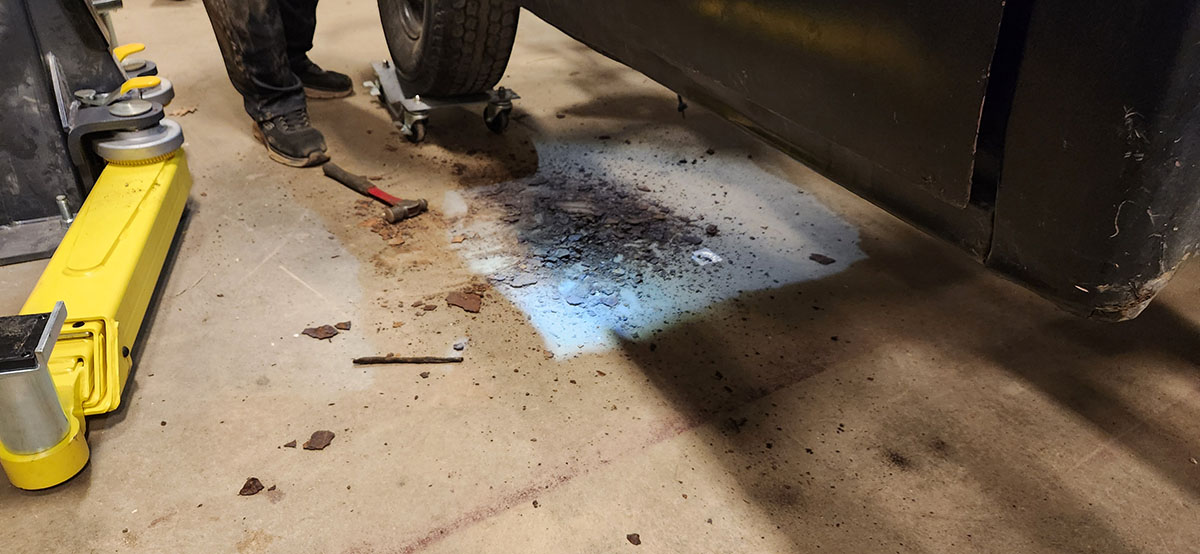
Dad, every time you hit the vehicle, more pieces of it fall off. Please stop that, it's demoralizing. You are breaking the car, Samir!
Anyway, with the preliminary damage survey complete, we turned our attention to the next challenge: the electrical system.
Now, you would think that a work truck from 1966 wouldn't have a very complicated electrical system, and relatively speaking you'd be right. Compared to a modern-day vehicle with all its sensors, computer controls, and whatnot, it's pretty basic. But on the shop floor, without that relative comparison for comfort, it's... it's a lot. By the 1960s, even the most basic motor vehicles had quite a few lights, gauges, and other electrical bits and pieces, to say nothing of the mass of wiring that makes the engine work.
In this pickup's case, all of that wiring was pretty crusty just from age--GM was not particularly concerned with the longevity of things like electrical wiring insulation in an age when cars were expected to be worked to death and scrapped within 10 years or so of construction. Beyond that, as is often the case in vehicles this old, it had been modified a lot, especially under the dash but also out in the engine bay, to the point where it was no longer clear what a bunch of stuff we found in there was even for.
So, after surveying the carnage, Dad made the executive decision that we were going to replace it. All of it.
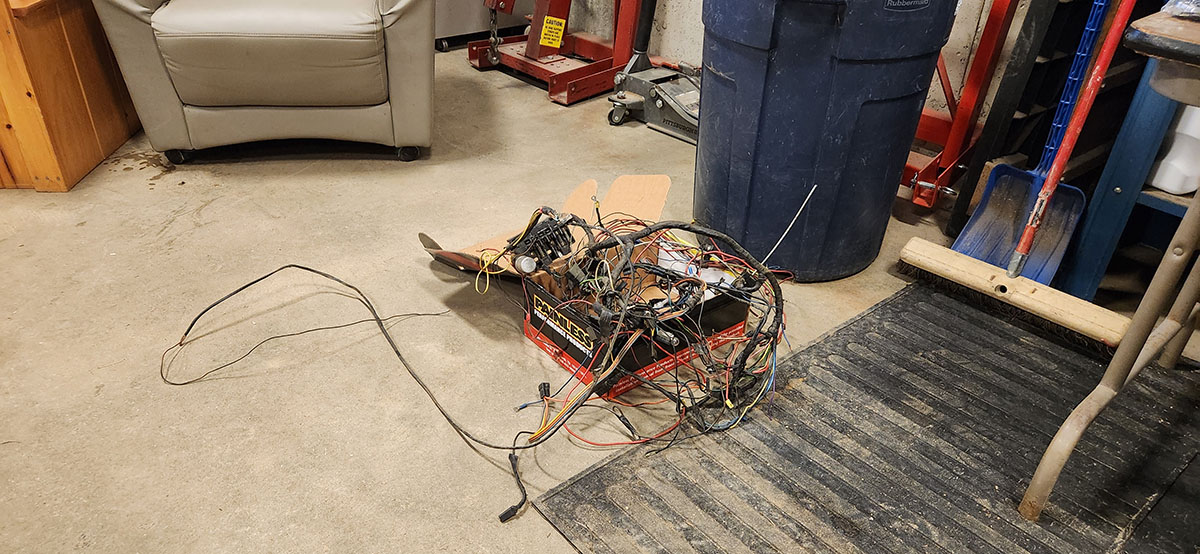
Fortunately, this is such a common outcome in the classic car scene that there are vendors who offer complete custom wiring harness kits for this exact purpose. Here's one now:
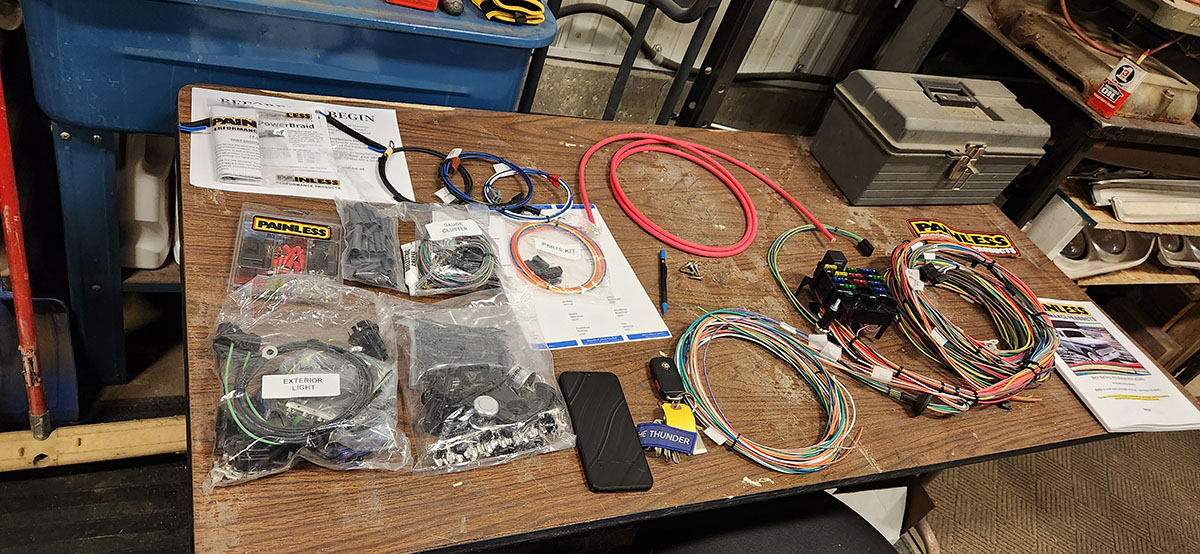
(This one's by Peerless Performance; other suppliers are available.)
This wiring harness isn't an exact duplicate of the original; it's been slightly modernized in terms of the materials used and standards employed. The new fuse block, for instance, contains modern push-in-type fuses, rather than the old-fashioned "glass tube with a contact at each end" type they used in 1966.
First order of business: remove what remains of the original wiring.
Yeah, that... didn't take long. Mostly because all the engine wiring was already gone.
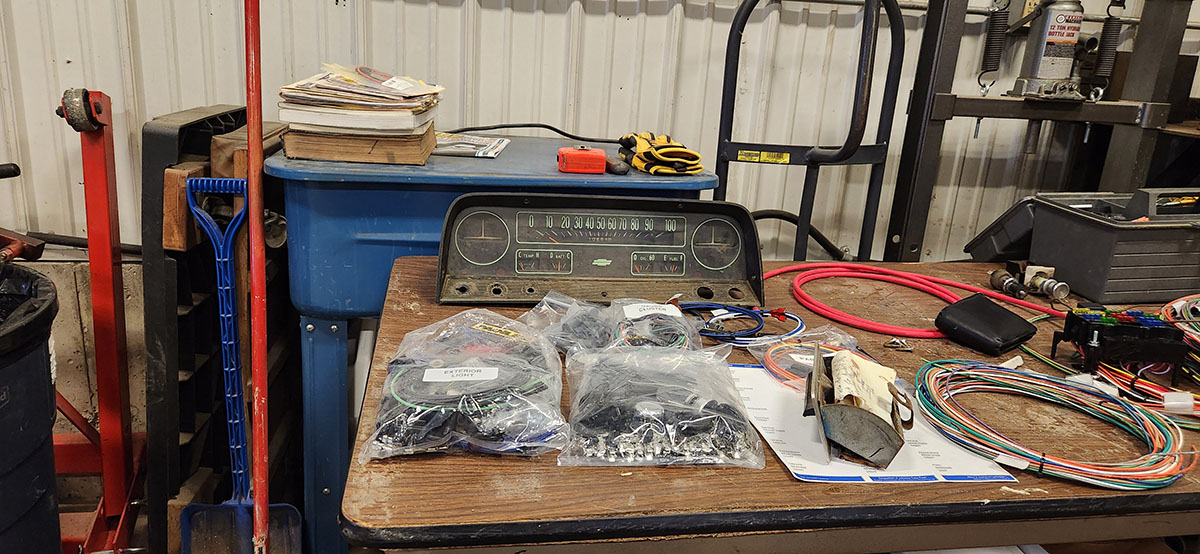
Hey look, it's the instrument cluster! I'll probably be rebuilding this soon. It certainly needs to be taken apart and cleaned, and neither of us can remember how many of the original gauges actually worked. Fortunately, the whole thing is modular, and replacements are available for the individual gauges.
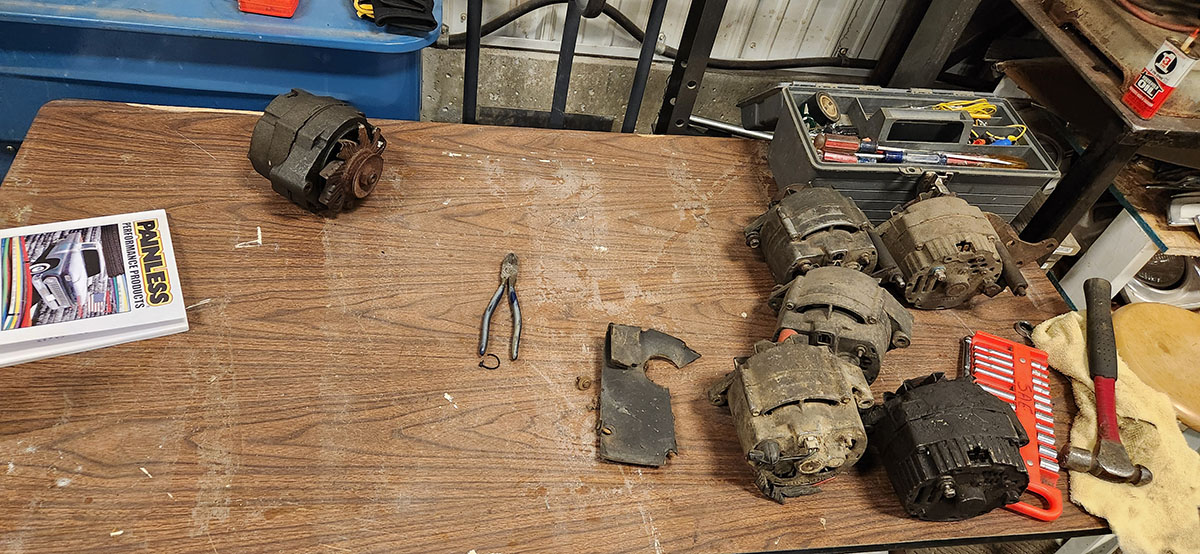
Six alternators, each alike in dignity, on fair folding table where we lay our scene.
These are all GM 10SI alternators, the go-to amperage-maker for generations of cars and trucks throughout the '60s and '70s, taken off various vehicles over the years and hoarded stored for later use. We dug them out to compare with the Peerless docs and figure out which bits and bobs from the alternator install kit we needed to use. We have no idea whether any of them work, but at least we'll get $6 off if we swap one of them for a new one. :)
First step of new harness install: put the fuse block where it needs to be and try not to let the dozens of wires attached to it get tangled up before they can be routed where they need to go.
In the old days, the fuse block would have been screwed or bolted to the back of the firewall. The new one has magnets on it. Really strong magnets. We were skeptical of this when we saw it in the manual, but I tell you what, that puppy's not going anywhere.
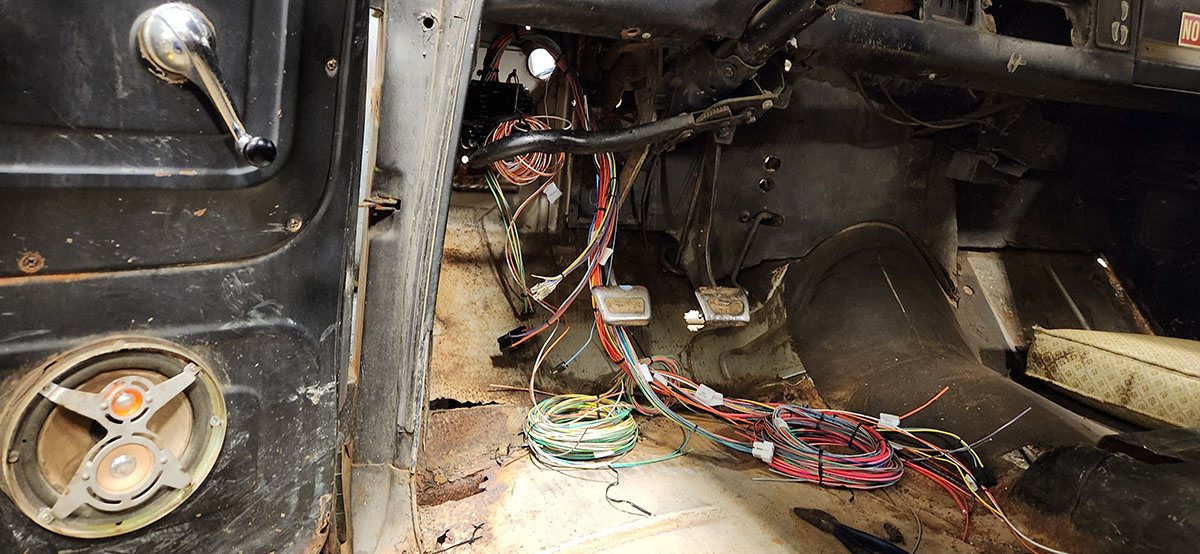
With the fuse block in place, the next order of business was to route the wires that need to be on the passenger side behind the dash and over the steering column. Then the ones that have to come out of the firewall can be put through the holes that are there for that purpose. In this particular vehicle, there are three groups of those.
First up is this bunch:
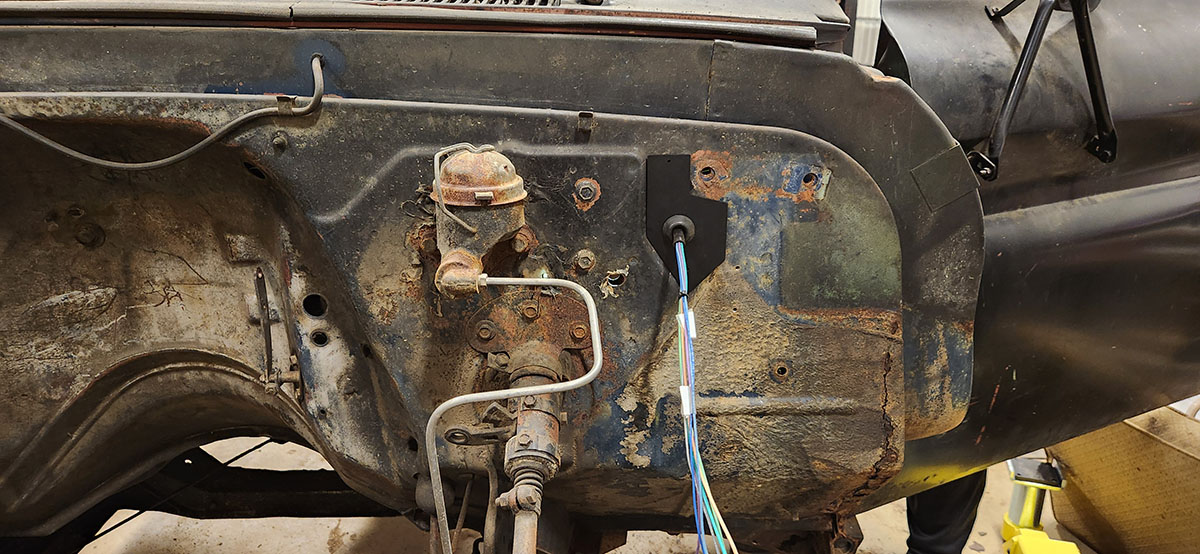
These are the wires that go to the front lights and the horn. They come through a hole high up on the driver's side--a hole that the folks at Peerless evidently think is too big, because they provided this little plate with a smaller hole in it to go over the original one.
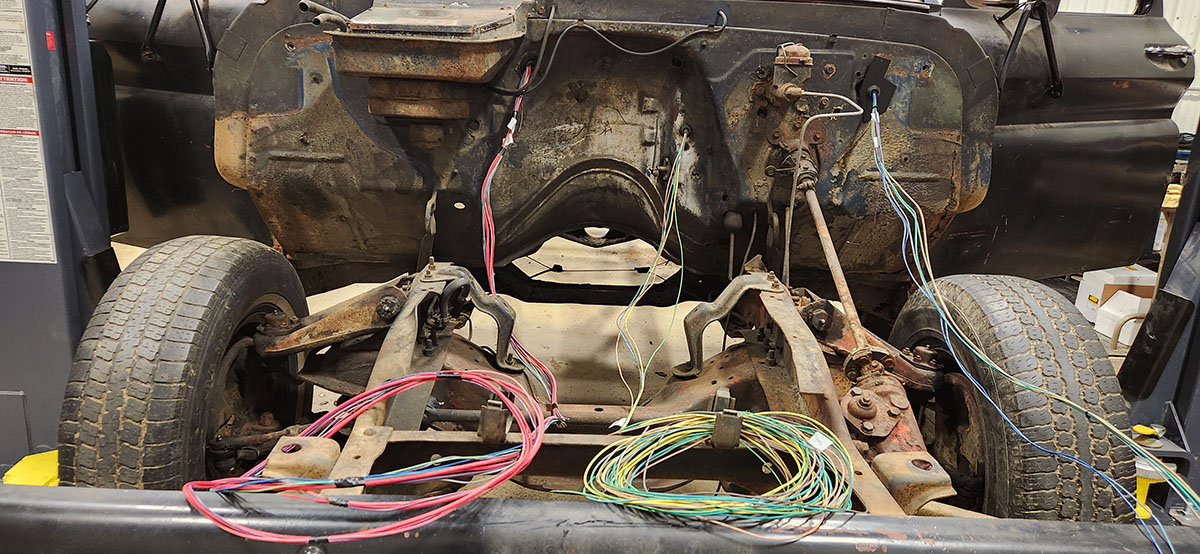
The other two bunches come out on opposite sides of the big dent in the firewall that's there to provide clearance for the bell housing on the back of the engine. The group on the right (mostly green and yellow) is made up of all the wires that need to go to the back of the truck, which is why they're so long. The one on the left is the engine wiring.
This was actually the first time we put all the engine and tail wiring through. We had just finished it when Dad took another look behind the dash and realized that there was a better place to route the big bunch that has to go over to the passenger side... which meant we had to pull all of that back through and run it again.
Sigh...
Here's where it ended up.
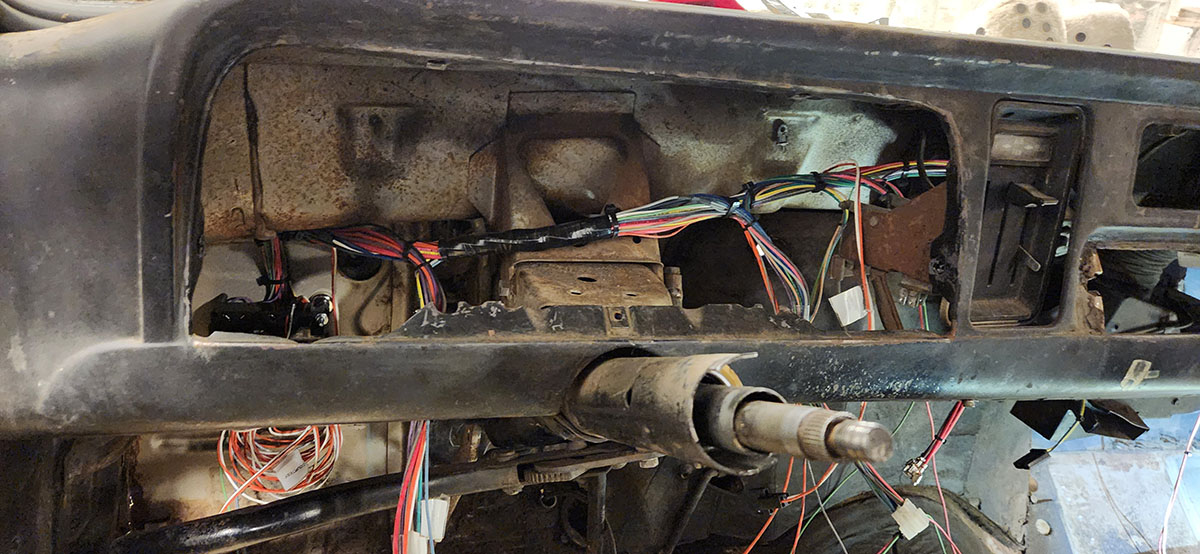
Before, he had all that run above the column but under that box structure in the middle, and there's a bunch of jagged corners under there that electrical wires really wouldn't agree with much. Only after getting everything in place did he notice that and realize it's probably meant to run behind the instrument cluster. (No, of course neither of us took note of where any of the old wiring was before pulling it out.)
Anyway, with the lessons learned from running the firewall stuff the first time, the second take wasn't so bad, and I notice now that I look at the photos that I coiled everything up much more neatly the second time.
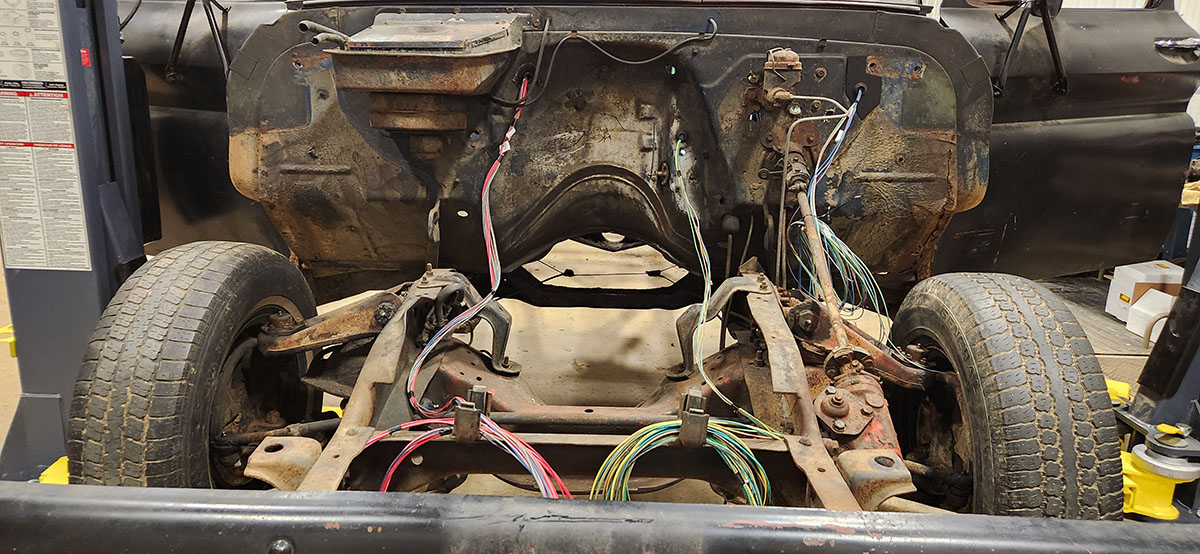
So, with that, we have all of the new wiring in place. None of it is connected to anything yet--much of what it's meant to connect to isn't actually on the vehicle at the moment--but that's still a pretty big step, and it was easier than we thought it would be when we opened the box and saw all those wires. :)
--G.
-><-
Benjamin D. Hutchins, Co-Founder, Editor-in-Chief, & Forum Mod
Eyrie Productions, Unlimited http://www.eyrie-productions.com/
zgryphon at that email service Google has
Ceterum censeo Carthaginem esse delendam.

 Printer-friendly copy


 Session 1
 RE: Session 1